
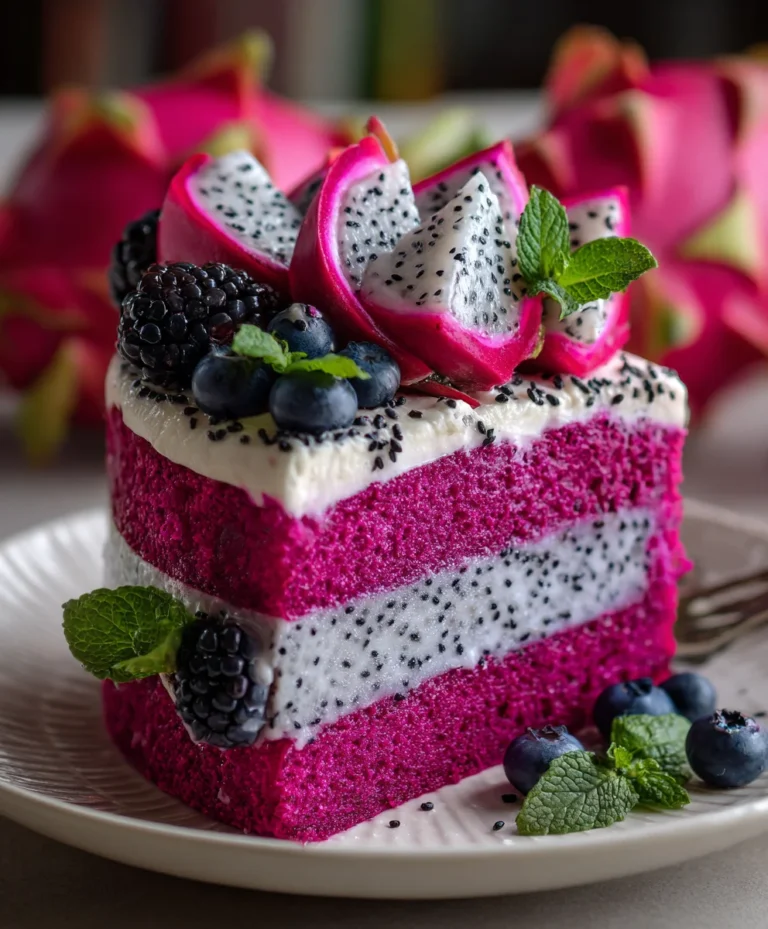
Introduction to Dragon Fruit Velvet Cake
Every once in a while, a dessert comes along that turns heads and warms hearts, and that’s exactly what I found in my Dragon Fruit Velvet Cake. Picture layers of moist, vibrant sponge paired with luscious cream cheese frosting that’s as delightful to taste as it is to look at. This cake is perfect for celebrations or simply to indulge your loved ones. If you’re like me, always seeking quick yet impressive recipes, this colorful treat is bound to capture everyone’s attention — and, trust me, it’s easier to make than it looks!
Why You’ll Love This Dragon Fruit Velvet Cake
This Dragon Fruit Velvet Cake is the answer to your dessert dreams! Not only does it boast a stunning magenta color, but it’s also a breeze to whip up. Imagine delighting family and friends with a dessert that tastes as good as it looks. It’s wonderfully moist and has just the right balance of sweetness. Plus, the unique flavor of dragon fruit adds a refreshing twist that makes every bite exciting. You’ll also love how approachable this recipe is for busy days.
Ingredients for Dragon Fruit Velvet Cake
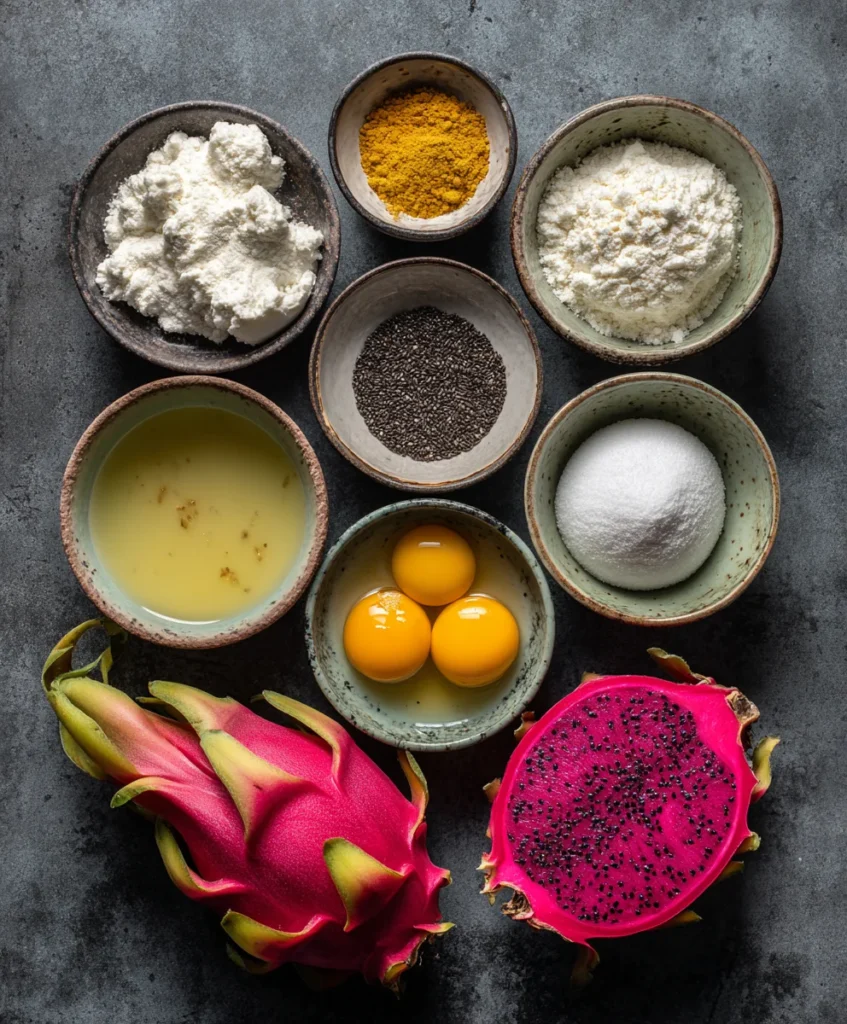
Before diving into the baking, let’s gather our vibrant ingredients! Here’s what you’ll need to create this enchanting Dragon Fruit Velvet Cake:
- All-purpose flour: The backbone of the cake, providing structure and a lovely crumb.
- Baking powder and baking soda: These leavening agents ensure your cake rises to fluffy perfection.
- Salt: Just a pinch, but it helps to enhance the overall flavors.
- Unsalted butter: Adds richness and moisture; make sure it’s softened for easy mixing.
- Sugar: Sweetens the cake while contributing to its tender texture.
- Eggs: Essential for binding and providing a lovely golden hue.
- Vanilla extract: A classic flavor booster that makes everything better.
- Vegetable oil: Keeps the cake moist longer, so it stays fresh and delicious.
- Milk: Enhances the cake’s moistness and softens the texture.
- Dragon fruit purée: The star of the show! Adds vibrant color and a subtly sweet, tropical flavor.
- Lemon juice: A touch of acidity balances the sweetness and enhances flavor brightness.
- Optional pink food coloring: For those wanting an extra pop of color in their cake!
Now let’s talk frosting! Here’s what you need:
- Cream cheese: Provides a rich, tangy creaminess that pairs beautifully with the cake.
- Unsalted butter: Again, very important for that creamy texture.
- Powdered sugar: Sweetens the frosting and helps achieve that perfect fluffy consistency.
- Vanilla extract: Just like in the cake, it elevates the frosting’s flavor.
- Extra dragon fruit purée: Adds a subtle taste and a natural pink tint.
For the decorative finish, fresh dragon fruit slices, berries, mint leaves, and even a sprinkle of dragon fruit seeds add charming flair. You can find dragon fruit in local grocery stores, but don’t hesitate to ask your produce manager if it’s not readily available! For specific measurements, check at the bottom of the article for a handy printable version.
How to Make Dragon Fruit Velvet Cake
Now comes the exciting part — making this scrumptious Dragon Fruit Velvet Cake! Let’s break it down into easy steps. You’ll be amazed at how simple and enjoyable the process can be. Ready? Let’s get started!
Preheat and Prepare Your Pans
First, preheat your oven to 350°F (175°C). This step is crucial for baking success.
While the oven warms up, grease and line two 8-inch round pans with parchment paper. This ensures your cake layers come out easily without sticking. A little preparation goes a long way, trust me!
Whisk Dry Ingredients Together
In a mixing bowl, whisk together all-purpose flour, baking powder, baking soda, and salt. This blend will help keep your cake light and fluffy.
Take a moment to breathe in that wonderful mix! The aroma of flour always reminds me of cozy kitchens and delicious memories.
Cream Butter and Sugar
Now, let’s cream the butter and sugar together. In another bowl, beat the softened unsalted butter and sugar for about 3 to 4 minutes until it’s creamy and fluffy. This is where the cake starts to come to life!
This step not only adds sweetness but creates air pockets for a luscious texture. You’ll know it’s ready when it’s light and pale!
Mix in Wet Ingredients
Next, add the eggs, one at a time, mixing well after each addition. Follow with the vanilla extract and vegetable oil. Each of these ingredients adds back moisture and flavor!
Then, blend in the vibrant dragon fruit purée and the lemon juice. You’re going to love that bright pop of color and taste merging into your batter!
Combine Wet and Dry Mixtures
It’s time to bring everything together! Gradually add your dry ingredients to the wet mixture, alternating with the milk. Begin and end with the dry ingredients.
This technique helps incorporate everything smoothly, creating a rich batter. Don’t over-mix; just combine until there are no dry spots! If you’re feeling adventurous, add in your optional pink food coloring for an even brighter cake!
Bake to Perfection
Pour the batter evenly into the prepared pans and smooth the tops. Bake for 25 to 30 minutes or until a toothpick inserted into the center comes out clean. Your kitchen will start to smell divine!
Let the cakes cool in the pans for about 10 minutes before transferring them to a wire rack to cool completely. Patience is key here! The wait is worth it for a perfectly baked cake.
Prepare the Cream Cheese Frosting
While the cakes cool, whip up the cream cheese frosting! In a bowl, beat the softened cream cheese and unsalted butter until smooth.
Gradually add the powdered sugar, mixing lightly to avoid a cloud of sweetness. Then, stir in the vanilla extract and your extra dragon fruit purée. Whip until fluffy and light — it will be hard not to taste it at this point!
Frost the Cake
Place one cooled cake layer on a serving plate. Spread a generous layer of frosting across the top. Then, stack the second layer and cover the entire cake in the remaining frosting.
Make sure to get crafty with the frosting! It doesn’t have to be perfect; a little rustic charm adds to the love.
Decorate Your Dragon Fruit Velvet Cake
Finally, chill the cake in the fridge for 30 minutes to set the frosting. This step ensures that your masterpiece slices beautifully!
When ready to serve, adorn your cake with fresh slices of dragon fruit, blackberries, and mint leaves. If you want to go all out, scatter some dragon fruit seeds on top — they add a lovely crunch and contrast.
And there you have it: a spectacular Dragon Fruit Velvet Cake that’s sure to impress! Your friends will be asking for the recipe before they even take a bite!
Tips for Success
- Ensure all your ingredients are at room temperature for better blending.
- Don’t skip the cooling step — it helps the cake hold its shape.
- Use a toothpick to check for doneness; it should come out clean.
- Store the cake in the fridge to keep it fresh and enhance flavors.
- For a taste twist, consider adding a splash of coconut milk!
Equipment Needed
- Two 8-inch round cake pans (or use one 9×13-inch pan).
- Mixing bowls of varying sizes (a large bowl and a medium bowl work best).
- Whisk and electric mixer (a hand mixer is perfectly fine too).
- Rubber spatula for easy batter scraping.
- Wire cooling rack for proper air circulation.
Variations
- Coconut Cream Frosting: Swap out the cream cheese for coconut cream for a tropical twist.
- Gluten-Free Option: Use a gluten-free all-purpose flour blend in place of regular flour.
- Vegan Version: Substitute eggs with flaxseed or chia seed egg replacements, and use dairy-free butter.
- Fruit Add-ins: Incorporate crushed pineapple or diced mango into the batter for added flavor.
- Spice It Up: Add a pinch of cinnamon or cardamom for a warm, aromatic flavor profile.
Serving Suggestions
- Pair the cake with a scoop of vanilla ice cream for a delightful contrast.
- Serve alongside a refreshing cup of herbal tea for a cozy afternoon treat.
- For a festive presentation, use edible flowers to decorate platters.
- A drizzle of chocolate sauce adds a tempting touch!
- Consider serving with a light fruit salad for a fresh side.
FAQs about Dragon Fruit Velvet Cake
Can I use frozen dragon fruit for this recipe? Absolutely! Just make sure to thaw and drain any excess liquid before pureeing. Frozen fruit can be just as flavorful and vibrant.
What if I can’t find dragon fruit? No worries at all! You can substitute with other fruit purees like raspberry or strawberry for a similar texture and a pop of color.
How do I store leftovers of the Dragon Fruit Velvet Cake? Store any leftover cake in an airtight container in the refrigerator. It will stay delicious for up to 3 days. Just be sure to let it come to room temperature before serving for the best flavor!
Can I make this cake ahead of time? You sure can! You can bake the cake layers one day in advance and frost it the next. Just keep the layers wrapped tightly in plastic wrap until you’re ready to assemble.
How can I make this cake dairy-free? To make a dairy-free version, substitute the butter with a non-dairy alternative and use almond or coconut milk instead of regular milk. Your cake will still be moist and tasty!
Final Thoughts
This Dragon Fruit Velvet Cake is more than just a dessert; it’s an unforgettable experience that brings joy to any gathering. With its stunning colors and tantalizing flavor, it’s bound to be the centerpiece of your table. Whether it’s a family birthday, a casual get-together, or simply a treat for yourself after a long week, this cake delivers cheer in every slice. I love watching my loved ones light up with delight when they take that first flavorful bite. So roll up your sleeves, embrace your inner baker, and create sweet memories with this delicious creation!