
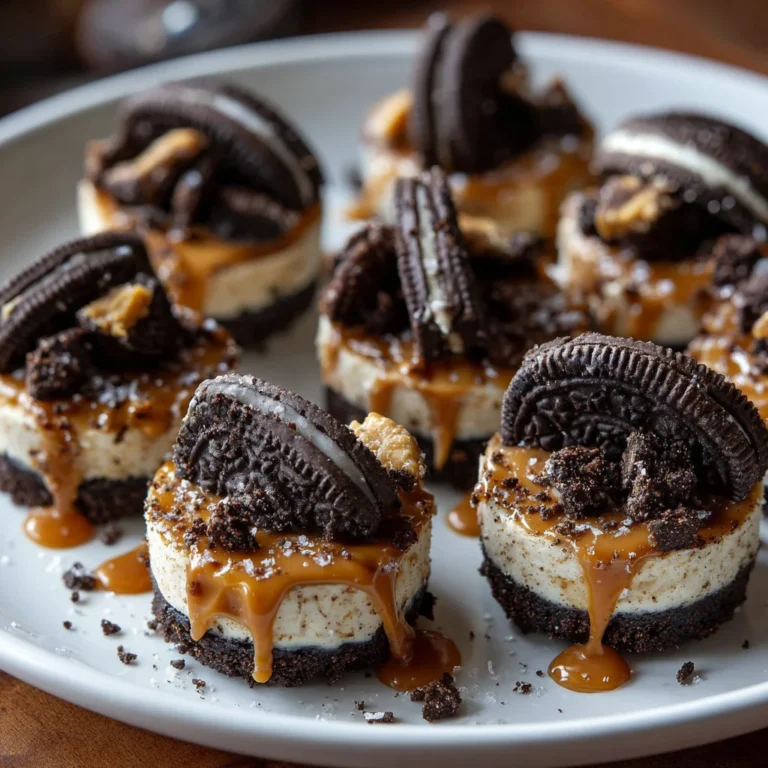
Introduction to Peanut Butter Oreo Cheesecake Bites
As a passionate home cook, I know how challenging it can be to whip up a delicious dessert when you’re juggling a million things! That’s where these Peanut Butter Oreo Cheesecake Bites come in. They are the perfect little treasures—rich, creamy, and utterly irresistible. Imagine impressing your family or indulging in a sweet treat after a busy day; it feels like a warm hug in dessert form! Plus, these bites are not only easy to make but also delightful to share. So, ready to dive into this heavenly experience? Let’s bake!
Why You’ll Love This Peanut Butter Oreo Cheesecake Bites
These Peanut Butter Oreo Cheesecake Bites are game-changers for busy lives! They combine the richness of cream cheese and peanut butter with the nostalgia of Oreos, creating a flavor explosion. Plus, they come together quickly, making them perfect for last-minute gatherings or a sweet treat after dinner. With just a handful of ingredients and minimal prep, you can whip up a dessert that feels like a heartfelt labor of love!
Ingredients for Peanut Butter Oreo Cheesecake Bites
Gathering the right ingredients sets the stage for a successful dessert experience. Here’s what you’ll need for these delightful Peanut Butter Oreo Cheesecake Bites:
- Oreo cookies: The classic cookie forms the base crust. You can also use a gluten-free version for a different twist.
- Unsalted butter: Melting this adds richness to the crust while keeping it flavorful without adding extra salt.
- Full-fat cream cheese: This provides that luscious, creamy texture we all adore. It’s essential, so don’t swap it out for reduced fat.
- Granulated sugar: Sweetens the filling, balancing the tangy cream cheese and rich peanut butter.
- Creamy peanut butter: The star ingredient! It adds flavor and richness, making every bite delightful and jam-packed with peanut goodness.
- Full-fat sour cream: Adds a touch of tartness and creaminess that helps whip everything together. You can try Greek yogurt as a substitute in a pinch!
- Flour or cornstarch: This helps stabilize the filling, making it perfectly yummy. Either works, depending on what you have available.
- Vanilla extract: A dash enhances flavor—always opt for the real deal when you can. It makes a difference!
- Pinch of fine salt: Just a sprinkle to elevate the sweetness and balance the flavors beautifully.
- Large eggs: Room temperature eggs help create a smooth filling. They’re crucial for the texture!
- Dark chocolate chips: These are used for the ganache, providing a rich, decadent top layer that’s hard to resist.
- Salted butter: Used in the ganache for added flavor—don’t skip it!
- Light corn syrup: This gives the ganache a lovely sheen and keeps it smooth when slicing the bites.
- Mini peanut butter cups: Optional but oh-so-delicious, they’re the perfect garnish for an extra touch of indulgence.
- Flaky sea salt: A final sprinkle on top adds a fancy touch that will impress your friends and family.
For exact measurements to get started, scroll down to the bottom of the article where you’ll find all the details available for printing.
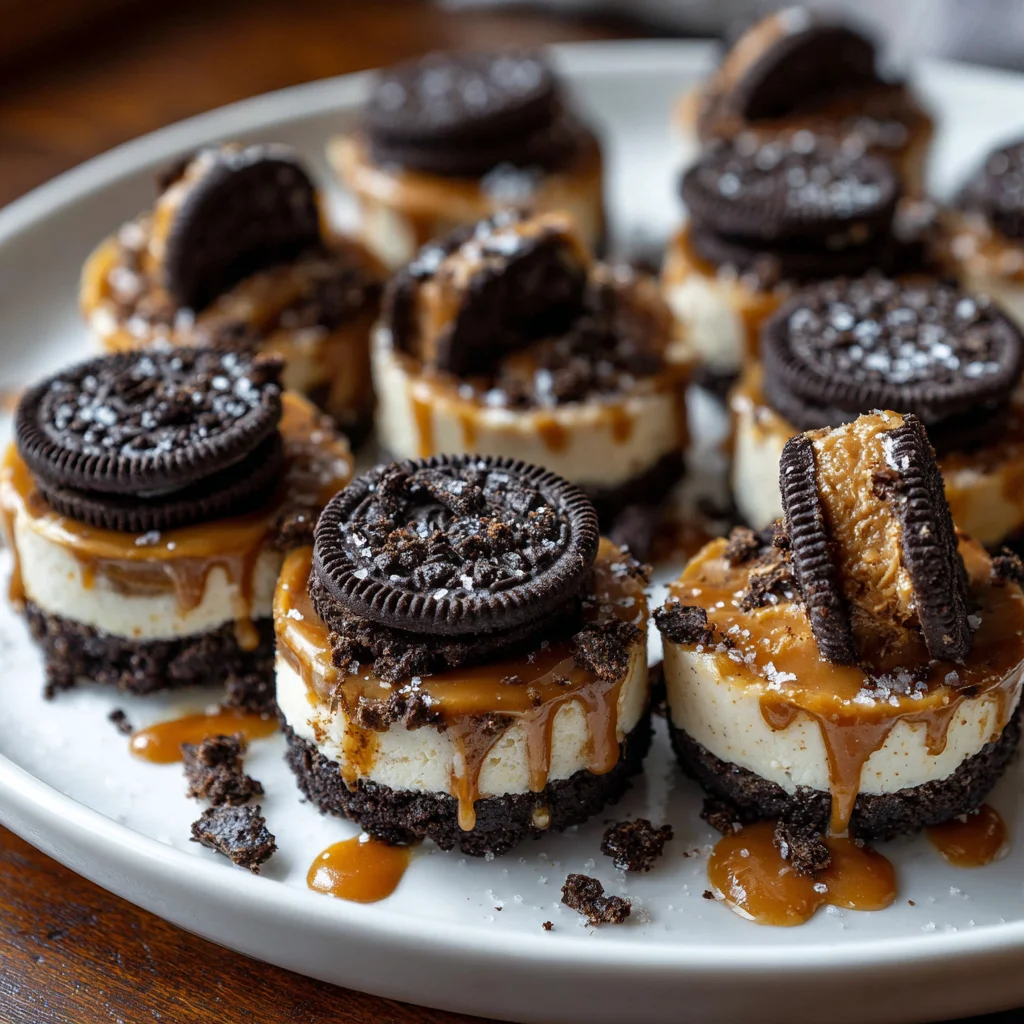
How to Make Peanut Butter Oreo Cheesecake Bites
Now that you have your ingredients ready, let’s dive into the process of making these delightful Peanut Butter Oreo Cheesecake Bites! Follow each step closely, and soon you’ll have a treat that will wow your taste buds.
Step 1: Preheat the Oven and Prepare the Cups
Begin by preheating your oven to 320°F (160°C). This step is crucial for achieving that perfect bake.
Next, line 18 cups of two cupcake tins with liners or grease a mini cheesecake pan with nonstick spray. If you’re using liners, it makes removing the bites a breeze later on. A swift spray of oil will prevent sticking, allowing for effortless serving!
Step 2: Make the Oreo Crust
Grab your food processor and toss in those Oreo cookies. Pulse them until you get fine crumbs. It’s like making cookie magic!
Now, add the melted butter to the crumbs, and pulse again until the mixture is evenly moistened. The texture should resemble wet sand, which is perfect for pressing into the cupcake cups.
Step 3: Bake the Crusts
Time to bake! Place the crusts in the preheated oven and bake for about 5 minutes. This will give them a nice, firm base.
Once they’re done, let the crusts cool completely. Cooling is essential to avoid melting the filling, so don’t rush this step!
Step 4: Prepare the Filling
Using a stand mixer fitted with a paddle attachment, beat the softened cream cheese until smooth, which should take about 2-3 minutes. Remember to scrape down the sides to ensure an even mix.
Next, mix in the granulated sugar, creamy peanut butter, sour cream, flour or cornstarch, vanilla extract, and a pinch of salt. Beat until everything is well combined. This filling is rich and oh-so-delicious!
Step 5: Bake the Cheesecake Bites
Spoon the heavenly filling evenly over each cooled crust. Fill them up to about three-quarters full to allow for some lovely rising!
Bake these cheesecake bites for 16-18 minutes, until their centers have a slight jiggle. Keep an eye on them—nothing worse than an overbaked cheesecake!
Step 6: Cool and Refrigerate Cheesecakes
After baking, remove them from the oven and allow to cool completely at room temperature. This will help with the texture.
Then, refrigerate the cheesecake bites for at least 4 hours, or ideally overnight. This setting time enhances the flavors and gives you that dreamy cheesecake consistency.
Step 7: Make the Ganache
For the ganache, combine dark chocolate chips, salted butter, and light corn syrup in a microwave-safe bowl.
Microwave the mixture in 30-second intervals, stirring in between until it’s fully melted and smooth. Don’t rush this step; patience will lead to that gorgeous sheen!
Step 8: Assemble and Garnish
Once the cheesecake bites are set, take a spoonful of that luscious ganache and pour it over each bite, spreading it evenly. This topping is the cherry on top!
Now, garnish each bite with half of a mini peanut butter cup for that extra sprinkle of fun. If you like a dash of saltiness, a light sprinkle of flaky sea salt will add a gourmet twist!
Tips for Success
- Always let your cream cheese and sour cream reach room temperature before mixing for a smoother texture.
- Keep an eye on the baking time! A little jiggle in the center means it’s perfectly done.
- Make these bites a day ahead to let the flavors truly develop—trust me, patience pays off!
- Use good-quality chocolate for the ganache; it makes all the difference!
- Experiment with add-ins like crushed nuts for added crunch!
Equipment Needed
- Oven: Essential for baking the cheesecake bites. A toaster oven can work in a pinch.
- Food processor: Great for making the crust. You can also crush the cookies in a zip-top bag with a rolling pin!
- Stand mixer: Perfect for mixing the filling, but a handheld mixer will do just fine.
- Cupcake tin or mini cheesecake pan: Required for shaping the bites. Silicone molds are another fun option!
- Microwave-safe bowl: Needed for melting chocolate; a small saucepan works too.
Variations on Peanut Butter Oreo Cheesecake Bites
- Chocolate Oreo Crust: Swap out regular Oreos for chocolate ones to enhance the chocolate flavor in your bites.
- Peanut Butter Alternatives: Try almond or cashew butter if you’re looking for a different nutty twist.
- Vegan Version: Use dairy-free cream cheese and nut milk to create a vegan-friendly treat.
- Gluten-Free Option: Choose gluten-free Oreos and ensure all other ingredients are certified gluten-free.
- Fruit Topping: Top with fresh raspberries or strawberries for a fruity contrast against the rich cheesecake.
Serving Suggestions for Peanut Butter Oreo Cheesecake Bites
- Pair with Coffee: A hot cup of coffee or iced latte complements the creaminess beautifully.
- Chocolate Sauce: Drizzle extra chocolate sauce on the plate for an elegant presentation.
- Fresh Fruit: Serve with fresh berries for a refreshing balance against the richness.
- Whipped Cream: A dollop of whipped cream can add a light touch to each bite.
- Presentation: Arrange them on a decorative platter and sprinkle with cocoa powder for a gourmet look.
FAQs about Peanut Butter Oreo Cheesecake Bites
Here are some common questions I’ve encountered from fellow home cooks about these delightful Peanut Butter Oreo Cheesecake Bites. Let’s dive in and clear up any uncertainties!
Can I make these cheesecake bites ahead of time?
Absolutely! In fact, making them a day in advance allows the flavors to meld beautifully. Just keep them refrigerated until you’re ready to serve.
How should I store leftover cheesecake bites?
Store any leftovers in an airtight container in the refrigerator. They should stay fresh for about 4 to 5 days, if they last that long!
Can I freeze these cheesecake bites?
Yes! Just freeze them before adding the ganache. Wrap each bite individually in plastic wrap and place them in a freezer-safe container for up to 2 months. Thaw them in the fridge before serving.
What can I use instead of cream cheese?
For a vegan option, try using dairy-free cream cheese or cashew cream! The texture might differ slightly, but you’ll still get that delightful taste.
Are there any nut-free options available?
If you’re looking to make nut-free cheesecake bites, you can replace the peanut butter with sunbutter or pumpkin seed butter, maintaining the delightful flavors but making it safe for nut allergies!
Final Thoughts
Making these Peanut Butter Oreo Cheesecake Bites is more than just baking; it’s about creating joyful moments. Each bite transports you into a sweet world where creamy peanut butter meets the nostalgic crunch of Oreos. Whether you’re treating yourself after a long day or sharing them with loved ones, these bites bring smiles and delight to any gathering. Plus, their ease of preparation means even the busiest days can end with a touch of sweetness. So, roll up your sleeves and let the flavors come together—enjoy the happiness they create with every delicious bite!