
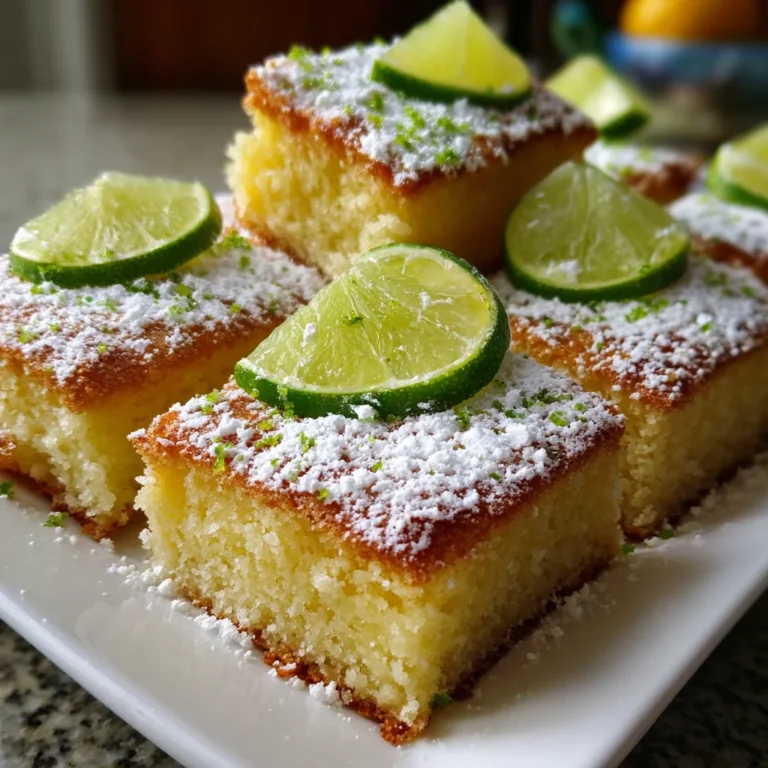
Introduction to Margarita Lime Cake Bars
Picture this: It’s a warm summer evening, and you want to impress friends or family without spending hours in the kitchen. That’s where my Margarita Lime Cake Bars come into play! These delightful bars are not only a quick solution for a busy day, but also a refreshing treat that brightens any occasion. With a buttery crust and zesty lime filling, they’re perfect for gatherings or just a sweet escape at home. Trust me, once you taste these bars, you’ll want to share the recipe with everyone!
Why You’ll Love This Margarita Lime Cake Bars
If you’re looking for an easy yet impressive dessert, look no further! My Margarita Lime Cake Bars are delightfully simple to make, with minimal prep time, perfect for busy moms and professionals. The combination of creamy filling and zesty lime is a crowd-pleaser, guaranteed to leave your family asking for more. Plus, they’re ready in just over an hour—ideal for those spontaneous summer gatherings!
Ingredients for Margarita Lime Cake Bars
Gathering the right ingredients is key to creating these delightful Margarita Lime Cake Bars. Here’s what you’ll need:
- Yellow Cake Mix: This forms the base of your bars, providing a lovely, buttery flavor.
- Unsalted Butter: Melted to ensure a rich crust that’s not overly salty; it adds moisture too!
- Egg: One egg helps bind the crust together, contributing to its perfect texture.
- Lime Zest: Freshly grated from a whole lime, this ingredient brings a burst of citrusy goodness, enhancing the cake’s flavor.
- Cream Cheese: Softened for the filling, it gives a creamy texture and balances the tartness of the lime.
- Powdered Sugar: Sweetens the filling perfectly without adding grittiness. You’ll use this in both the filling and for garnishing!
- Tequila: This is where the fun begins! Just 3 oz gives your bars a delightful adult twist.
- Margarita Mix: Adds that classic margarita flavor, bringing a sweet-tart punch to the filling.
- Vanilla Extract: A splash of this enhances the overall flavor profile, making the bars all the more delicious.
- Additional Lime Zest: For garnish, it not only looks pretty but also adds an extra zing!
- Margarita Salt: A fun and festive finish that can take your dessert presentation to the next level.
For exact measurements, check the bottom of the article where they’re available for printing! You can easily adjust ingredients based on availability—feel free to substitute or leave out ingredients to suit your taste. Enjoy the process as much as the delightful results!
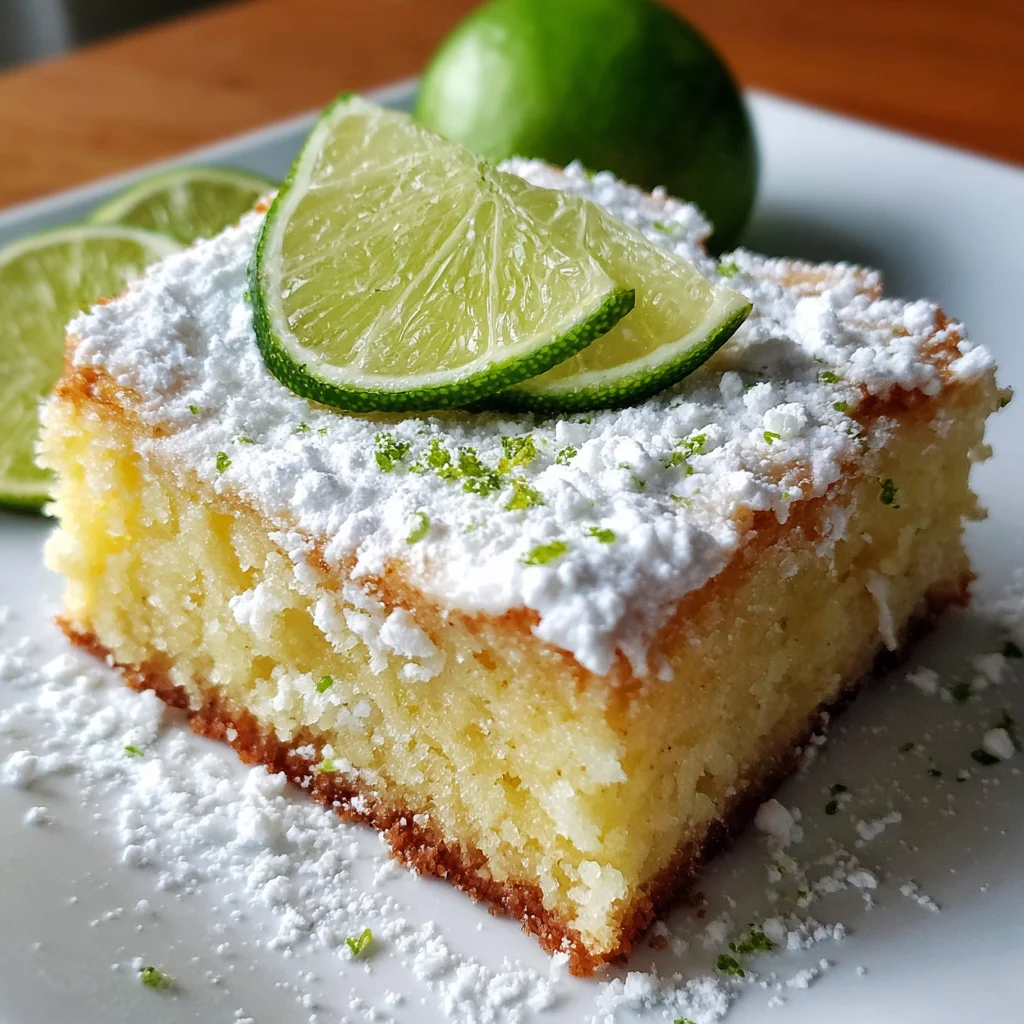
How to Make Margarita Lime Cake Bars
Making Margarita Lime Cake Bars is not just a baking task—it’s an adventure in your kitchen! Follow these simple steps, and you’ll have a delightful treat ready to impress!
Step 1: Prepare the Oven and Baking Dish
First things first, let’s preheat that oven to 350°F (175°C). This ensures the bars bake evenly. Line a 9×13 inch baking dish with parchment paper. For easy removal later, spray the dish with non-stick baking spray before placing the parchment in. Don’t forget to spray the parchment too, so nothing sticks!
Step 2: Make the Crust
In the bowl of your stand mixer, combine the yellow cake mix, melted butter, and one egg. Mix on medium to high speed until everything comes together and forms a ball of dough. It should be slightly sticky but hold together. If it seems a bit too crumbly, feel free to add a splash of milk to achieve the right consistency!
Step 3: Press the Crust
Now, take that dough and press it evenly into the bottom of your prepared baking dish. Use your hands or a flat measuring cup for an even layer. This crust is the base of the bars, so take your time to ensure it’s compact. A good layer will make all the difference in texture!
Step 4: Prepare the Filling
Grab a medium-sized bowl for the filling. Start with cream cheese, powdered sugar, and two eggs. Add your tequila, margarita mix, vanilla extract, and lime zest. Use an electric mixer to combine these until smooth and creamy. You want no lumps at all—it’s the key to that luscious filling! Remember, scraping down the sides of the bowl helps mix everything evenly.
Step 5: Bake the Bars
Time to pour that velvety filling over your crust in the baking dish. Pop it into the preheated oven! Bake for 40 to 45 minutes. Keep an eye on it; the edges should turn a light golden brown, while the center might still have a bit of a jiggle. That’s a good sign for these bars—patience is crucial here!
Step 6: Cool and Garnish
Once baked, remove the dish from the oven and let the bars cool for at least one hour. This cooling time helps them set perfectly. Before serving, you’ll want to get a little fancy! Dust the top with powdered sugar, sprinkle some margarita salt, and finish with that extra lime zest. The result? A beautiful presentation that’s ready to wow!
Tips for Success
- Always use room temperature eggs, as they blend better into your batter.
- For a stronger margarita flavor, feel free to adjust the tequila to your taste.
- Check for doneness by gently jiggling the baking dish; the center should have a slight wobble.
- Letting the bars chill in the fridge overnight enhances their flavor.
- Experiment with lime garnishes—add thin lime slices for extra flair!
Equipment Needed for Margarita Lime Cake Bars
- 9×13 inch Baking Dish: You can use any similar-sized dish if needed!
- Parchment Paper: For easy removal of the bars; foil works in a pinch.
- Stand Mixer: A hand mixer is a fine substitute if that’s what you have.
- Mixing Bowls: Grab a couple for mixing crust and filling.
- Measuring Cups and Spoons: Essential for accuracy in baking!
Variations of Margarita Lime Cake Bars
- Fruit-Infused Options: Add fresh berries like raspberries or strawberries to the filling for a fruity twist, enhancing the flavor and presentation.
- Gluten-Free Version: Swap the yellow cake mix for a gluten-free cake mix to make it suitable for those with dietary restrictions.
- Vegan Adaptation: Replace eggs with flax eggs and use a dairy-free cream cheese alternative. Opt for vegan margarita mix as well!
- Chocolate Delight: Swirl in some melted chocolate into the filling for a decadently rich variation that chocolate lovers will adore.
- Spicy Kick: Mix in a pinch of cayenne pepper or chili powder into the crust for those who love a little heat with their sweet!
Serving Suggestions for Margarita Lime Cake Bars
- Refreshing Drinks: Pair these bars with a cold glass of limeade or a classic margarita to enhance the citrusy experience.
- Garnish Style: Add fresh mint leaves alongside the bars for a pop of color and freshness.
- Accompaniments: Serve with a side of whipped cream or a scoop of vanilla ice cream for extra indulgence.
FAQs about Margarita Lime Cake Bars
Can I make these Margarita Lime Cake Bars ahead of time?
Absolutely! These bars can be made a day in advance. Just let them cool and refrigerate. The flavors actually meld beautifully when they sit overnight!
Can I adjust the amount of tequila in the recipe?
Yes, definitely! If you prefer a lighter taste, reduce the tequila. Conversely, feel free to increase it for a robust margarita flavor.
What is the best way to store leftover bars?
Store uneaten bars in an airtight container in the fridge. They’ll stay fresh for up to a week—if they last that long!
Can I freeze these cake bars?
Yes! You can freeze the bars for up to three months. Just wrap them tightly in plastic wrap, then foil, to prevent freezer burn. Thaw in the fridge before serving.
What other toppings can I use besides powdered sugar and lime zest?
You can get creative! Try crushed graham crackers, a drizzle of chocolate, or even some chopped pecans for texture and added flavor.
Final Thoughts
There’s something incredibly satisfying about baking a dessert that brings joy and smiles. My Margarita Lime Cake Bars are more than just a treat; they’re a celebration of flavor and fun! Each bite transports you to sun-soaked days and carefree laughter, making them perfect for summer gatherings or cozy evenings at home. With easy preparation and delightful taste, these bars are a reliable go-to for any occasion. So why not give this recipe a try? I promise it’ll become a staple in your dessert repertoire, bringing happiness to your table and warmth to your heart!