
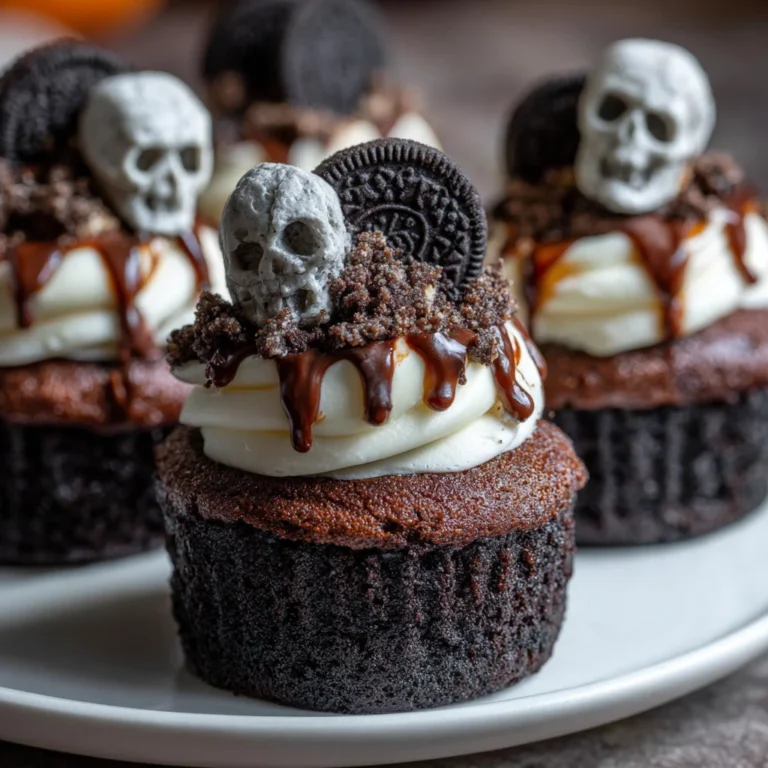
Introduction to Halloween Graveyard Cupcakes
As the leaves turn and shadows stretch, it’s time to sprinkle in some spooky fun! These Halloween Graveyard Cupcakes are an enchanting treat that brings delight and a dash of fright to your celebrations. We all know how busy life gets, especially around Halloween, right? Between school events, work commitments, and planning the perfect costume, finding time to bake something splendid can be a challenge. Thankfully, this recipe is a delightful way to impress your loved ones without spending ages in the kitchen.
So grab your apron, and let’s get ready to whip up these eerily cute cupcakes!
Why You’ll Love This Halloween Graveyard Cupcakes
These Halloween Graveyard Cupcakes are not just treats; they’re a time-saver and a crowd-pleaser! With easy steps to follow, anyone can whip up these creepy confections in no time. The flavors are heavenly, thanks to the Oreo cheesecake filling and rich chocolate buttercream. Plus, they look incredible on any table, adding that spooky flair we all adore during the season. Trust me, they’ll disappear faster than you can say “trick or treat!”
Ingredients for Halloween Graveyard Cupcakes
Before diving into the spooky fun, let’s gather our ingredients! Each one plays a vital role in creating these delightful Halloween Graveyard Cupcakes. Below is a list that will help you get started.
- Lotus biscoff biscuits: These add a crunchy texture for our gravestones. If you can’t find them, graham crackers work just as well!
- Dark chocolate: Used for coating the biscoff biscuits and bringing a rich chocolaty flavor to the mix. Any quality dark chocolate will do!
- White chocolate: Great for adding cute designs to the gravestones. You could also use candy melts if you prefer!
- Baking spread or unsalted butter: This helps create a tender texture; choose whichever you have on hand, though butter hits the sweet spot!
- Caster sugar: This fine sugar helps dissolve quickly, ensuring a smooth batter. A regular white sugar can substitute in a pinch.
- Eggs: These act as the binding agent; make sure they’re at room temperature for the best results.
- Milk: A dash of milk keeps the cupcake batter moist and fluffy.
- Self-raising flour: Essential for light and airy cupcakes. If you only have all-purpose flour, simply add some baking powder!
- Cocoa powder: Provides that deep chocolate flavor we crave in a cupcake. Choose an unsweetened variety for better control over sweetness.
- Baking powder: A little booster for our cupcakes, ensuring they rise perfectly.
- Full-fat cream cheese: This gives us a rich and creamy Oreo cheesecake filling, elevating our cupcakes to another level!
- Icing sugar: Used to sweeten our filling and frosting. Powdered sugar is always a safe choice.
- Oreos, crushed: We’ll stir these into our cheesecake filling—such a delightful treat on their own, too!
- Vanilla extract: Adds a warm, fragrant note to both the filling and buttercream.
- Unsalted butter: Essential for the buttercreams. Ensure it’s softened so it mixes easily.
- Green food coloring: Just a hint transforms our buttercream into enchanting edible grass—perfect for a spooky landscape!
- Crushed Oreos: To sprinkle on top, they give a fun, dirt-like appearance—a classic Halloween touch!
Remember, exact quantities are available at the bottom of the article, where you can print this recipe to bring your spooky vision to life!
How to Make Halloween Graveyard Cupcakes
Now that we have our ingredients ready, it’s time for the fun part: making these Halloween Graveyard Cupcakes! Follow these simple steps to create your spooky treats, and let’s unleash our inner pastry chefs!
Making the Biscuit Gravestones
First, let’s start on our biscuit gravestones. Snap about a third off the end of each Lotus biscoff biscuit and dip it into melted dark chocolate. The chocolate adds that eerie touch while securing the gravestones’ look. Place them on baking paper and let them set—this will take about 10 minutes. Once set, melt some white chocolate and pipe your desired designs or names onto the biscuits. Be creative! Let the white chocolate designs set completely before using.
Baking the Cupcakes
Next, we’ll mix up the cupcake batter! Preheat your oven to 140C Fan/160C/325F/Gas Mark 3. Line a cupcake tin with cupcake cases. In a mixing bowl, combine softened baking spread and caster sugar. Use an electric whisk or stand mixer to beat them together until it’s light and fluffy, which should take about 5 minutes. Add in the eggs one at a time, mixing well after each addition, then pour in the milk. This is where the magic of flavor starts!
Now, gently fold in the self-raising flour, cocoa powder, and baking powder using a spatula. Remember, be gentle! Overmixing can deflate those lovely air bubbles we’ve created. Once well combined, divide the batter evenly among the cupcake cases. Bake for 25-30 minutes until a skewer inserted into the center comes out clean. Let the cupcakes cool completely on a wire rack. This cooling stage is vital for that perfect cupcake!
Preparing the Oreo Cheesecake Filling
While our cupcakes cool, let’s whip up the delicious Oreo cheesecake filling! In a bowl, mix the full-fat cream cheese with icing sugar and vanilla extract until it’s creamy and smooth. Don’t rush—take your time! Once the mixture is velvety, stir in the crushed Oreos. This adds that satisfying crunch. Set this aside as we wait for our cupcakes to cool completely before filling them!
Decorating the Cupcakes
Oh, here comes the fun part—decorating! Start by making your chocolate buttercream. In a bowl, mix softened unsalted butter, cocoa powder, and icing sugar using an electric whisk. Gradually add in milk until you reach a smooth consistency that’s easy to pipe. Once your cupcakes have cooled, it’s time to fill them with that luscious cheesecake mixture. Use a cupcake corer or a knife to create a small hole in each cupcake and generously fill it with the Oreo cheesecake filling.
Now for the piping! Take your chocolate buttercream and pipe it onto each cupcake, smoothing the tops out for an even finish. Insert the chocolate-covered biscuit gravestones into the cupcake tops. Sprinkle some crushed Oreos around the gravestone to add that ‘dirt’ effect.
Finally, for the green grass, mix softened unsalted butter and icing sugar in a separate bowl. Add in some vanilla extract and green food coloring, mixing until you have that perfect, grassy green look. Pipe this around the biscuit gravestones for a delightful finishing touch. Your spooky masterpiece is almost ready! Now step back and admire your scary creations—your Halloween Graveyard Cupcakes are looking fang-tastic!
Tips for Success
- Ensure your ingredients are at room temperature for a smoother batter.
- Don’t rush the cooling process; filling warm cupcakes can make a mess!
- Use a piping bag for a cleaner application of buttercream.
- Feel free to get creative with gravestone designs!
- For easy cleanup, line your work area with parchment paper.
Equipment Needed
- Cupcake tin: A standard muffin tin will work if you don’t have one.
- Mixing bowls: Use any size; just make sure they are large enough for the batter.
- Electric whisk or stand mixer: Hand whisking is fine, but it takes longer!
- Spatula: Handy for folding in dry ingredients.
- Piping bags: If you don’t have one, a sturdy zip-lock bag will do.
Variations on Halloween Graveyard Cupcakes
- Gluten-free: Substitute self-raising flour with a gluten-free all-purpose blend to cater to gluten sensitivities.
- Vegan: Replace eggs with flaxseed meal and use a dairy-free butter and cream cheese alternative for a completely vegan version.
- Flavor twists: Experiment with flavored cake mixes, like pumpkin spice or red velvet, to change up the base of your cupcakes.
- Alternative decorations: Use candy pumpkins or gummy worms for fun gravestone companions on your cupcakes.
- Healthier options: Swap out some sugar with applesauce or mashed bananas for a lower-sugar treat without losing flavor.
Serving Suggestions for Halloween Graveyard Cupcakes
- Pair your spooky cupcakes with a refreshing apple cider to complement the sweet flavors.
- For extra festivity, serve with themed cupcakes stands or tiered platters for an eye-catching display.
- Include creepy treats like chocolate-covered pretzels on the side for a delightful mix.
FAQs about Halloween Graveyard Cupcakes
Can I make this Halloween Graveyard Cupcakes recipe in advance?
Absolutely! You can bake the cupcakes and prepare the Oreo cheesecake filling a day ahead. Just store the cupcakes in an airtight container and keep the filling refrigerated until you’re ready to assemble. Decorating them right before serving ensures they’re fresh and fun!
How do I store leftover Halloween Graveyard Cupcakes?
Store any leftovers in an airtight container at room temperature for up to 3 days. If you live in a warm area, consider refrigerating them to keep the buttercream from melting. Enjoy them for a late-night sweet treat!
Can I customize the cupcake flavors?
You sure can! While this recipe features chocolate cupcakes, you could easily swap the vanilla for a pumpkin spice or vanilla flavor. Just think outside the box and let your creativity shine!
What if I don’t have a piping bag for decorating?
No worries at all! If you don’t have a piping bag handy, simply use a sturdy zip-lock bag. Fill it with buttercream, snip off one corner, and pipe away! It’s an easy hack that makes decorating more accessible.
Are these Halloween Graveyard Cupcakes suitable for kids?
<pDefinitely! Kids will love making and decorating these spooky treats. Plus, they’re a fun way to get them involved in holiday baking. Just keep an eye on the melted chocolate and let them unleash their creativity with the décor!
Final Thoughts
There’s something truly magical about baking, especially during this enchanting time of year. Crafting these Halloween Graveyard Cupcakes can transform any ordinary afternoon into a festive celebration. The joy on your loved ones’ faces as they indulge in these spooky treats is simply priceless. Plus, it’s a fun way to ignite creativity and foster family bonding in the kitchen. Whether you’re hosting a Halloween party or just looking to brighten up a regular day, these cupcakes are a spooky delight everyone will love! So, roll up those sleeves and enjoy the sweet adventure of baking this season!