
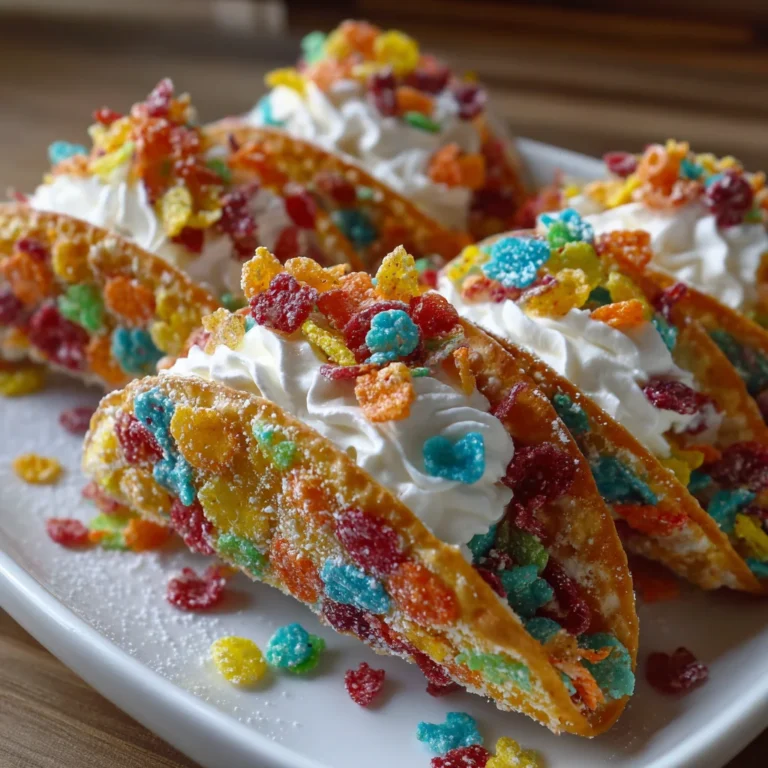
Introduction to Fruity Pebbles Cheesecake Tacos
Hey there, fellow home cooks! If you’re anything like me, you often find yourself juggling a million things but still want to bring joy to your kitchen. That’s where these Fruity Pebbles Cheesecake Tacos come in! This whimsical dessert will not only put a smile on your face but also impress your family or friends. It’s perfect for a quick solution on a busy day or a delightful treat for a special occasion. Let’s dive into this colorful culinary adventure together, because who doesn’t love a sweet taco treat?
Why You’ll Love This Fruity Pebbles Cheesecake Tacos
These Fruity Pebbles Cheesecake Tacos are the ultimate dessert that brings joy to your table without the fuss. They’re quick to whip up, making them a lifesaver on busy nights. Plus, the creamy filling paired with that crunchy, colorful shell creates a delightful combination that’ll tickle your taste buds. Perfect for both kids and adults, this fun dessert will have everyone asking for seconds—because who can resist such a vibrant treat?
Ingredients for Fruity Pebbles Cheesecake Tacos
When making these delightful Fruity Pebbles Cheesecake Tacos, you’ll need some fun and colorful ingredients that come together to create a dessert masterpiece. Here’s what you’ll be gathering:
- Colorful fruity cereal: This is the star player! It not only adds crunch but also vibrant colors to your taco shells. Go for the nostalgic classic to keep it fun.
- Unsalted butter: Used to bind the cereal together, gentle melting is key to keeping the colors bright. Unsalted allows control over the final dish’s saltiness.
- Cream cheese: This gives our cheesecake filling its rich and creamy texture. Make sure it’s softened, or it won’t blend well.
- Powdered sugar: Perfect for sweetening the filling without making it grainy, it also contributes to that soft consistency we love in cheesecakes.
- Vanilla extract: A splash of flavor that elevates the dessert; you can even use almond extract for a fun twist!
- Whipped cream: The light, fluffy component that lightens the cream cheese filling. For a dairy-free option, you could try whipped coconut cream.
- Additional fruity cereal for garnish: Sprinkle some extra on top for visual appeal and even more crunch!
Exact measurements for these ingredients can be found at the bottom of the article for your convenience. Grab your shopping list and get ready for a sweet culinary adventure!
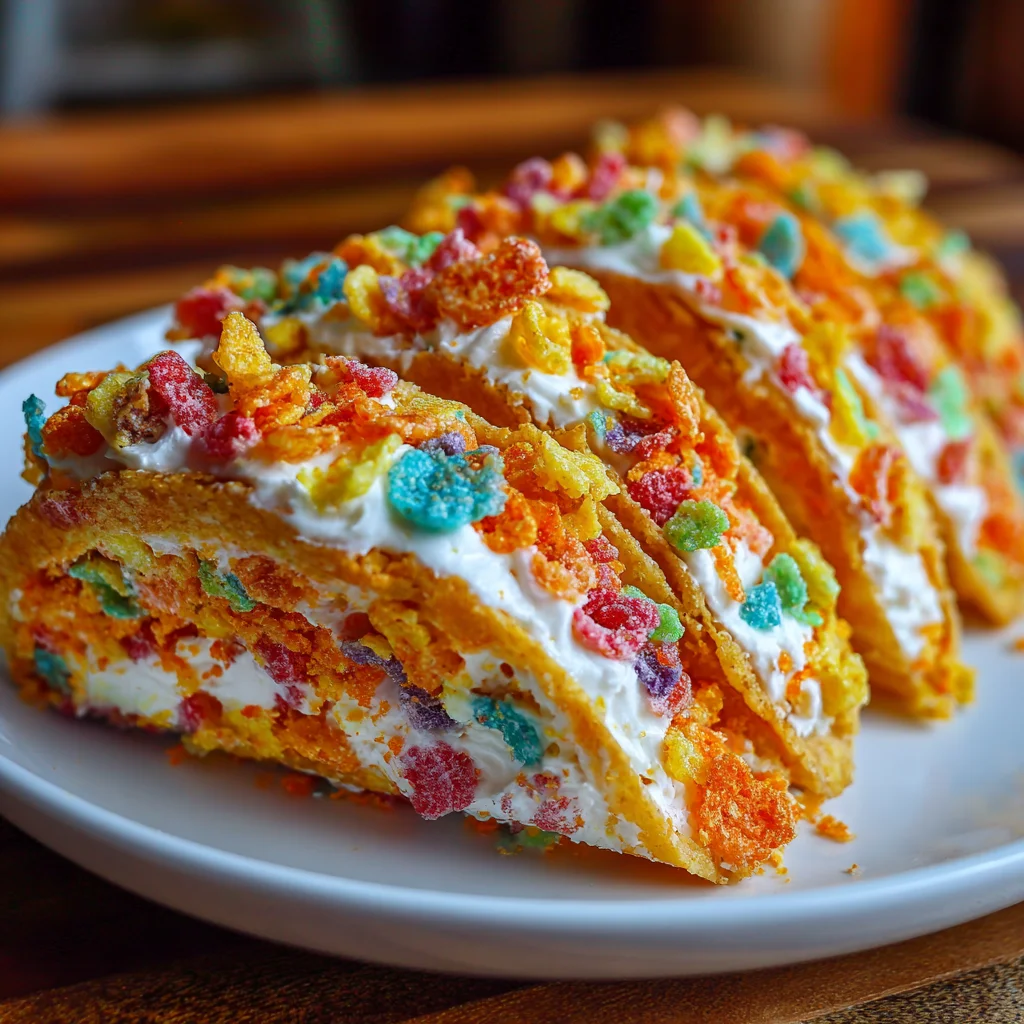
How to Make Fruity Pebbles Cheesecake Tacos
Now that we’ve gathered our fun ingredients, it’s time to get creative and make those delightful Fruity Pebbles Cheesecake Tacos! Follow these simple steps, and you’ll have a colorful treat that’s sure to bring joy to your kitchen.
Step 1: Prepare the Taco Shells
Begin by taking your colorful fruity cereal and pouring it into a large bowl. Melt your butter gently in the microwave. Once it’s warm, not hot, pour it over the cereal. Mix everything well until each piece is coated in buttery goodness. This step is crucial; a well-coated cereal leads to better taco shells!
Next, take your mixture and press it firmly into taco-shaped molds or the curved sections of a muffin tin. Aim for shells that are about 1/4 inch thick. The fun part? Getting in there with your fingers! Pop these shells into the refrigerator for at least 30 minutes to firm up. Trust me, the wait will be worth it!
Step 2: Make the Cheesecake Filling
While those shells chill, let’s get our cheesecake filling ready. Grab your softened cream cheese and plop it into a mixing bowl. Using an electric mixer, beat it for about 2 minutes until it’s smooth and fluffy. It should look creamy and delicious!
Next, add in the sifted powdered sugar and vanilla extract. Mix again, scraping the bowl’s sides often. This will help combine all the elements into a silky filling. Remember, this is where the magic happens, so take your time with it!
Now, gently fold in the whipped cream using a rubber spatula. Be careful not to deflate it; we want our filling to stay nice and airy. Just lift and fold; your filling will look like a cloud in dessert form!
Step 3: Assemble the Tacos
Time for the fun part! Retrieve your chilled taco shells from the fridge. Using a spoon or a piping bag, fill each shell generously with the cheesecake filling. Go ahead and let it overflow a bit, because who doesn’t love a generous dessert?
As you fill each taco, you should feel that satisfaction of crafting something truly special. Don’t be shy! The more filling, the better.
Step 4: Final Touches
To make these tacos pop, give them a sprinkle of additional fruity cereal on top. Press it gently so it adheres nicely to the filling. This not only looks amazing but adds that extra crunch we can’t resist!
Now, you can serve them immediately for that fabulous crunch, or if you prefer, refrigerate them for up to 2 hours. Just know that the fresh crunch is what we’re aiming for! Enjoy every colorful, creamy bite of your Fruity Pebbles Cheesecake Tacos!
Tips for Success
- Keep your butter warm, not hot, to preserve the cereal’s color.
- Make sure your cream cheese is softened for easy mixing.
- Chill the taco shells for at least 30 minutes for proper firmness.
- Use a piping bag for a clean, mess-free filling process.
- Serve immediately to keep that delightful crunch intact!
Equipment Needed for Fruity Pebbles Cheesecake Tacos
- Large mixing bowl: Any bowl will do, just make sure it’s big enough!
- Electric mixer: A hand mixer works great if you don’t have a stand mixer.
- Taco-shaped molds or muffin tin: You can use simple cupcake liners for a quick alternative.
- Rubber spatula: This helps gently fold ingredients without deflating your whipped cream.
- Spoon or piping bag: For filling those delicious taco shells with ease!
Variations of Fruity Pebbles Cheesecake Tacos
- Chocolatey Delight: Substitute half the fruity cereal with chocolate cereal for a deliciously rich twist.
- Berry Cheesecake: Add crushed freeze-dried berries to the cheesecake filling for a fresh flavor boost.
- Gluten-Free Option: Use gluten-free fruity cereal and ensure that all other ingredients are gluten-free for those with sensitivities.
- Dairy-Free Delight: Swap cream cheese with a dairy-free alternative and use coconut or almond whipped cream.
- Nutty Bliss: Sprinkle some chopped nuts or toasted coconut on top for an added crunch and flavor contrast.
Serving Suggestions for Fruity Pebbles Cheesecake Tacos
- Pair with fresh fruit, like strawberries or blueberries, for a refreshing touch.
- Serve alongside a scoop of vanilla ice cream for an indulgent treat.
- Drizzle with chocolate or caramel sauce for an extra flavor kick.
- Use colorful plates to make your dessert pop even more!
- Offer a variety of toppings like whipped cream or sprinkles!
FAQs about Fruity Pebbles Cheesecake Tacos
Can I make Fruity Pebbles Cheesecake Tacos ahead of time?
Absolutely! You can prepare the taco shells a day in advance and store them in the refrigerator. Just fill them on the day you plan to serve for the best crispiness!
What can I substitute for cream cheese?
If you’re looking for a lighter option, try Greek yogurt or ricotta cheese. For a dairy-free choice, use a plant-based cream cheese alternative!
Can I use a different type of cereal?
<pCertainly! While Fruity Pebbles are fun and colorful, you can mix things up with different fruity cereals, or even crunchy granola. Just keep an eye on the flavor profile!
How should I store leftovers?
To keep them fresh, store any leftovers in an airtight container in the refrigerator. They should be eaten within 2 days for the best taste and texture!
Can kids help with this recipe?
<pDefinitely! This recipe is perfect for kids to get involved in. They can help with pouring, mixing, and, of course, licking the bowl afterwards. It’s a fun family activity!
Final Thoughts on Fruity Pebbles Cheesecake Tacos
There’s something truly magical about serving up these Fruity Pebbles Cheesecake Tacos. Each colorful bite evokes a sense of nostalgia while also sparking joy in both kids and adults. It’s not just a dessert; it’s an experience wrapped in a fun taco shape that invites smiles and laughter. As you gather around the table, eager to devour these delights, you’ll create precious moments worth cherishing. Whether it’s a special occasion or a simple weekday treat, these tacos are sure to bring sweetness and happiness to your kitchen. So go ahead, indulge, and let the good times roll!