
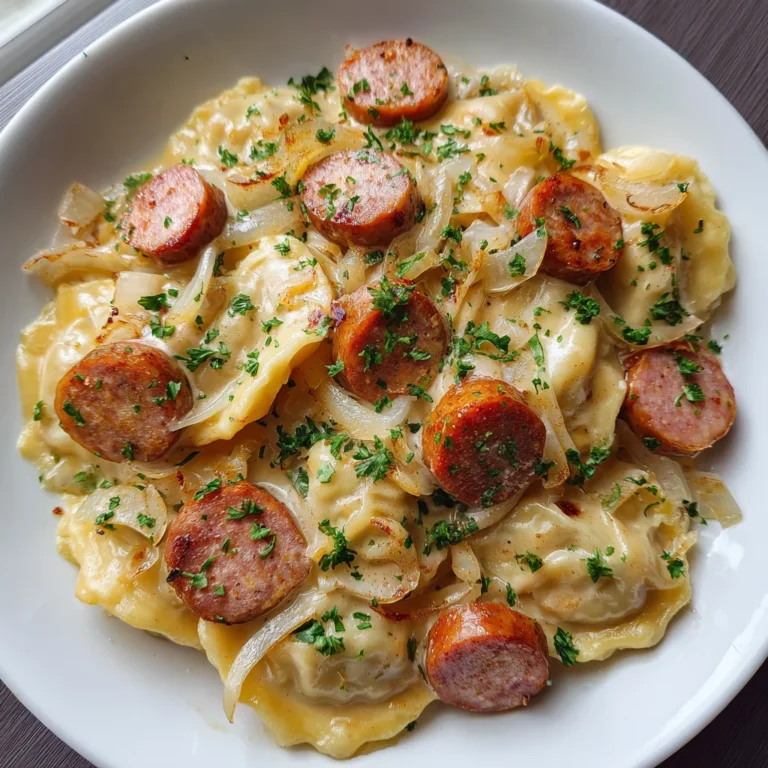
Introduction to Easy Pierogi Sausage Casserole
As a passionate home cook, I know how hectic life can get, especially for busy moms and professionals. That’s why I’m thrilled to share this Easy Pierogi Sausage Casserole with you! This dish is not just a quick solution for a busy day, it’s a warm hug on a plate that your loved ones will adore. Picture layers of cheesy pierogies paired with savory smoked kielbasa—pure comfort food bliss! This casserole not only brings joy to your table but is a delightful way to create bonding moments over a hearty family meal.
Why You’ll Love This Easy Pierogi Sausage Casserole
This Easy Pierogi Sausage Casserole is a game changer for anyone pressed for time! It packs a punch of flavor with minimal effort, making it ideal for busy weeknights or family gatherings. You get layers of creamy, cheesy goodness that will have everyone coming back for seconds. Plus, it’s wonderfully filling, comforting, and a breeze to prepare, allowing you to spend less time in the kitchen and more with your loved ones.
Ingredients in Easy Pierogi Sausage Casserole
Gathering the right ingredients is key to a successful casserole. Here’s what you’ll need to whip up this delicious dish:
- Frozen potato and cheese pierogies: These little delights are the heart of the casserole, providing a comforting base. They come pre-cooked, so no need to thaw—just toss them in straight from the freezer!
- Smoked kielbasa: Slice this savory sausage into rounds for a burst of flavor in every bite. You can easily switch it for your favorite type of sausage if you prefer a different taste.
- Condensed cream of mushroom soup: This pantry staple adds creaminess and richness to the dish. It’s a fantastic base for sauces and brings everything together beautifully.
- Sour cream: A dollop of sour cream elevates the creaminess while providing a slight tang, perfectly balancing the flavors.
- Shredded cheddar cheese: Who doesn’t love a cheesy casserole? Cheddar melts beautifully and contributes to that golden bubbly layer that we all crave.
- Milk: This is optional, but if you want a slightly thinner sauce, a splash of milk helps achieve just the right consistency.
- Onion: Sautéed onions offer a depth of flavor, while their sweetness adds balance to the savory sausage.
- Fresh parsley: Chopped parsley is a delightful garnish option that adds a pop of color and freshness to your dish.
- Olive oil: A touch of oil helps in cooking the sausage and onions, giving them a nice sear for extra flavor.
- Salt and black pepper: These seasonings are essential for enhancing all the flavors in your casserole.
For the exact measurements and printable details, don’t forget to check the bottom of the article!
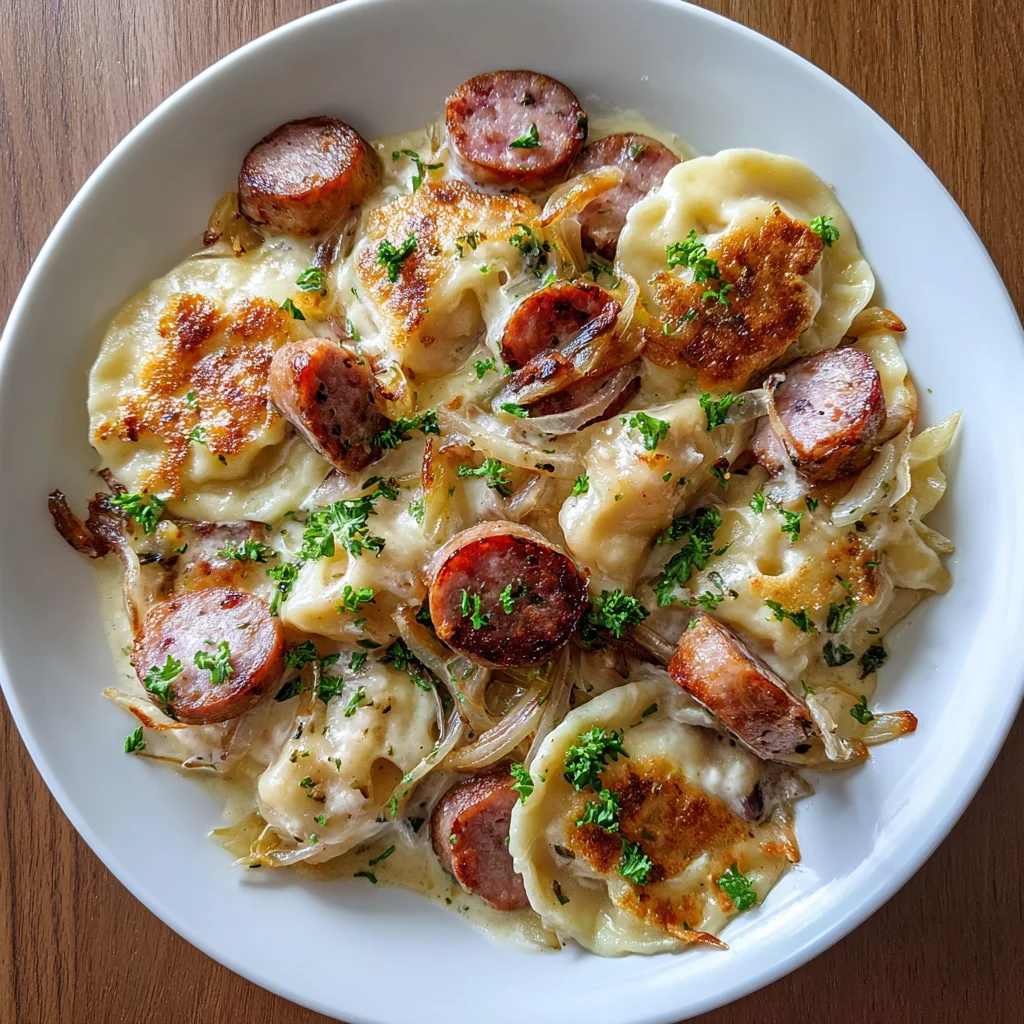
How to Make Easy Pierogi Sausage Casserole
Step 1: Preheat and Prepare
First things first, preheat your oven to 350°F. This gives it time to warm up, so your casserole cooks evenly. Next, grab a 9×13 inch casserole dish and grease it with a bit of olive oil or nonstick spray. This prevents sticking and ensures your cheesy masterpiece comes out easily. Trust me, nothing feels better than a clean dish after dinner!
Step 2: Brown the Kielbasa
In a large skillet, heat a splash of olive oil over medium heat. Toss in your sliced smoked kielbasa and get cooking! Allow it to sizzle away until the edges turn a lovely golden brown, which should take about 4 to 6 minutes. Once done, gently remove the sausage with a slotted spoon and set it aside. This deliciousness adds great flavor to your casserole!
Step 3: Sauté the Onions
Now, using the same skillet, toss in your thinly sliced onions. Sauté them for about 4 to 6 minutes until they soften and begin to caramelize. You’ll notice their sweet aroma filling your kitchen, and that’s when you know you’re onto something special. Make sure to season lightly with salt and black pepper to really bring out their sweetness. Remove from heat once they’re beautifully golden.
Step 4: Mix the Sauce
In a medium-sized bowl, whisk together the condensed cream of mushroom soup, sour cream, and optional milk until smooth. This is where the magic happens! If you prefer a creamier sauce, feel free to add more milk. Taste and season with salt and pepper as desired. This sauce will add a richness that perfectly complements the pierogies and sausage, making each bite utterly delightful!
Step 5: Layer Ingredients
Time to bring it all together! Start by arranging half of the frozen potato and cheese pierogies in an even layer at the bottom of your prepared dish. Next, sprinkle half of the browned kielbasa and half of the sautéed onions. Now scoop half of your delicious sauce mixture over these layers and spread it evenly. Don’t hold back on that cheese! Add 1 cup of shredded cheddar cheese. Repeat this process with the remaining pierogies, sausage, onions, and sauce, and finish off with another cup of cheese. Yes, please!
Step 6: Bake the Casserole
Now that your casserole is assembled and looking gorgeous, tightly cover it with aluminum foil. Pop it in the preheated oven and let it bake for about 25 minutes. This helps everything to meld together beautifully. After that, remove the foil to let the bubbly cheese shine! Bake for an additional 10 to 15 minutes until the cheese is melted and golden brown. Your kitchen will smell heavenly!
Step 7: Finishing Touches
Once the casserole is out of the oven, resist the urge to dive right in. Let it rest for about 5 minutes; this really helps the layers set and makes serving easier. If you’re feeling adventurous, broil the casserole for 1 to 2 minutes for extra browning—just keep a close eye on it! Finish off with a sprinkle of fresh parsley for that perfect touch, and get ready to enjoy!
How to Make Easy Pierogi Sausage Casserole
Step 1: Preheat and Prepare
Start by preheating your oven to 350°F. This ensures that your casserole bakes evenly throughout. While the oven heats up, grab a 9×13 inch casserole dish and grease it lightly with olive oil or nonstick spray. This step is crucial for ensuring your delicious Easy Pierogi Sausage Casserole slides out with ease once it’s cooked. After all, nobody wants to wrestle with a sticky dish after a long day!
Step 2: Brown the Kielbasa
In a large skillet, heat a light drizzle of olive oil over medium heat. Toss in the sliced smoked kielbasa and let it sizzle beautifully. Cook until the edges turn a lovely golden brown—this takes about 4 to 6 minutes. The browning adds those irresistible flavors. Once done, remove the sausage with a slotted spoon, letting the excess oil drain. This tasty meat will bring depth to your casserole!
Step 3: Sauté the Onions
Using the same skillet, it’s time to sauté those onions! Just add your thinly sliced onions and cook them until they soften and caramelize, which should take around 4 to 6 minutes. The smell? Heavenly! Adding a pinch of salt and black pepper will help enhance their natural sweetness. Once golden and fragrant, remove them from heat and set aside. These onions are the secret weapon for building flavor in your casserole.
Step 4: Mix the Sauce
In a medium bowl, whisk together the creamy condensed cream of mushroom soup, sour cream, and a splash of optional milk. This combination creates a dreamy sauce that perfectly coats every layer of your casserole. Make sure everything is blended smoothly; it should be rich and creamy! Adjust the milk based on your preference for sauce thickness. A little taste test here is key, so season with salt and pepper as needed!
Step 5: Layer Ingredients
Now comes the fun part—layering! Start by arranging half of the frozen potato and cheese pierogies in a single layer across the bottom of your greased casserole dish. Then, sprinkle over half of the browned kielbasa followed by half the sautéed onions. Next, dribble half of that luscious sauce evenly on top. Remember, it’s about balance! Top this layer with 1 cup of shredded cheddar cheese. Repeat the process with the remaining pierogies, sausage, onions, and sauce, and finish it off with the last cup of cheese. Yes, that’s right—let’s get cheesy!
Step 6: Bake the Casserole
Your casserole is nearly ready! Tightly cover the dish with aluminum foil and place it in the preheated oven. Bake for 25 minutes; this helps all the flavors meld beautifully. Once the time is up, carefully remove the foil. Allow the casserole to bake for another 10 to 15 minutes until the cheese turns golden and bubbly. Your kitchen will be filled with a mouthwatering aroma—trust me, it’s worth the wait!
Step 7: Finishing Touches
Once baked, don’t rush to dig in just yet! Allow your Easy Pierogi Sausage Casserole to rest for about 5 minutes to help set those delicious layers. If you’re after extra golden perfection, pop it under the broiler for 1 to 2 minutes—just keep an eye on it to prevent burning. Finally, a sprinkle of fresh parsley not only looks lovely but also adds a burst of freshness before serving!
Tips for Success
- Always preheat your oven to ensure even baking.
- Don’t thaw the pierogies; they cook perfectly from frozen!
- Adjust the cream of mushroom soup with milk to control sauce thickness.
- Feel free to experiment with different sausages or add vegetables for extra flavor.
- Make it ahead—assemble the casserole and refrigerate, baking when you’re ready!
Equipment Needed
- Casserole dish: A 9×13 inch dish works perfectly; a glass or ceramic version is great for even cooking.
- Large skillet: Any nonstick skillet will make browning the kielbasa and onions easier.
- Medium bowl: For mixing the sauce. A whisk or fork will do the trick.
- Slotted spoon: This helps remove the sausage without excess grease.
Variations of Easy Pierogi Sausage Casserole
- Vegetarian Version: Swap the smoked kielbasa with sautéed mushrooms or hearty vegetables like zucchini and bell peppers for a meatless twist.
- Spicy Kick: Add diced jalapeños or a sprinkle of red pepper flakes to the sausage layer for a spicy flare that’ll wake up your taste buds!
- Herbed Delight: Incorporate fresh herbs such as thyme or dill into the sauce for an aromatic lift that complements the creamy flavors beautifully.
- Gluten-Free Option: Ensure that your cream of mushroom soup is gluten-free and opt for gluten-free pierogies for a safe version for those with dietary restrictions.
- Different Cheeses: Experiment with different cheeses, such as mozzarella or a smoky gouda, to create a unique flavor profile in every bite.
Serving Suggestions for Easy Pierogi Sausage Casserole
- Pair with a simple side salad for a refreshing crunch.
- Serve with crusty bread or garlic bread for a hearty addition.
- A glass of chilled white wine or sparkling water enhances the meal.
- For presentation, sprinkle additional fresh parsley over the top before serving.
- Add a dollop of sour cream on the side for extra creaminess!
FAQs about Easy Pierogi Sausage Casserole
Can I make this Easy Pierogi Sausage Casserole ahead of time?
Absolutely! You can assemble the casserole in advance and refrigerate it until you’re ready to bake. Just keep in mind that you might need to adjust the baking time slightly if it’s cold straight from the fridge.
What sausages can I use in this casserole?
While smoked kielbasa is the go-to choice, feel free to swap it with your favorite sausage. Italian sausage, turkey sausage, or even vegetarian options work wonderfully for a delightful twist!
How do I store leftovers?
Store any leftovers in an airtight container in the refrigerator for up to three days. When reheating, you can just pop it in the oven until warmed thoroughly, or use the microwave for a quicker option.
Is this recipe suitable for gluten-free diets?
Yes! Just make sure to use gluten-free pierogies and check that your cream of mushroom soup is also gluten-free. That way, everyone can enjoy this comforting dish!
Can I add vegetables to this casserole?
Definitely! Adding vegetables like spinach, bell peppers, or even broccoli can enhance nutrition and add a burst of color. Just sauté them along with the onions for added flavor!
Final Thoughts
Making this Easy Pierogi Sausage Casserole has been a delightful journey for me, and I hope it brings as much joy to your table as it has to mine. The comforting layers of pierogies and sausage create a symphony of flavors that warms the heart. It’s not just about filling bellies; it’s about creating cherished memories around the dinner table. Watching my family gather, share laughter, and indulge in every cheesy bite reaffirms why I love cooking. This recipe truly embodies the essence of comfort food, making it a dish I find myself excited to share time and again!