
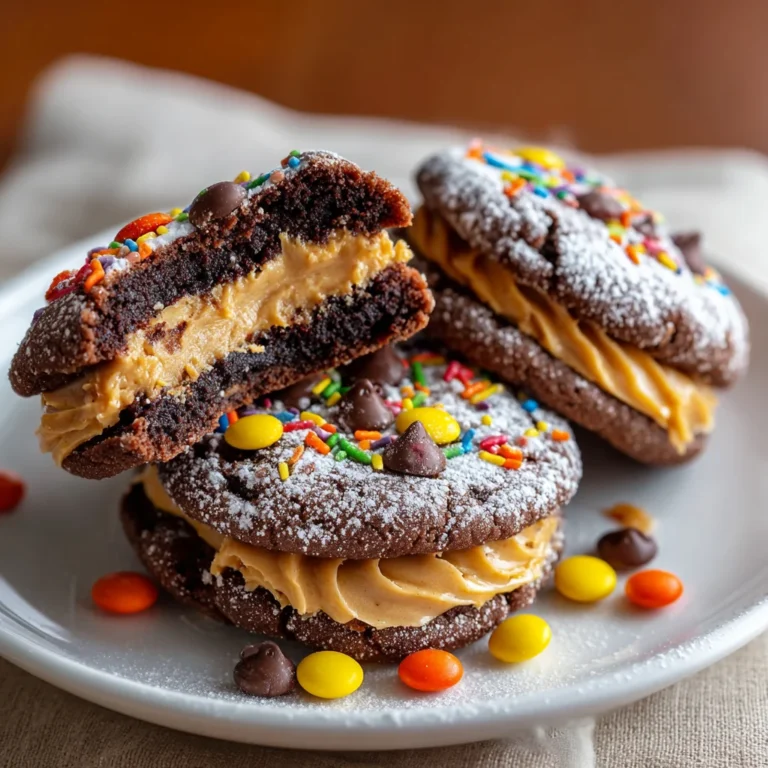
Introduction to Chocolate Peanut Butter Cookies
Is there anything more comforting than the aroma of freshly baked Chocolate Peanut Butter Cookies wafting through the house? I think not! These little gems are a delightful combination of rich chocolate and creamy peanut butter, creating an irresistible treat that anyone can whip up—even on the busiest of days. They offer that perfect balance of sweet and salty, bringing joy with every bite. Whether you’re making them for a family gathering, a last-minute party, or just to indulge yourself, these cookies are bound to impress and warm hearts. Trust me, you won’t want to share them!
Why You’ll Love This Chocolate Peanut Butter Cookies
These Chocolate Peanut Butter Cookies are not just delicious; they’re incredibly easy to make! In just a little over half an hour, you can enjoy warm, chewy cookies that are sure to satisfy even the pickiest of eaters. The rich chocolate pairs perfectly with the creamy peanut butter center, creating a flavor explosion that will leave you craving more. Plus, the recipe is simple enough for busy moms like us to tackle without stress!
Ingredients for Chocolate Peanut Butter Cookies
Gathering the right ingredients is half the fun! Here’s what you’ll need to create these delightful Chocolate Peanut Butter Cookies:
- Peanut Butter: Choose creamy or crunchy for that perfect filling.
- Powdered Sugar: This sweetens the filling and gives it a lovely texture.
- Whole Milk: Adds creaminess to the filling; the richer, the better!
- Vanilla Extract: Infuses a warm flavor that brings all the ingredients together.
- Salt: Just a pinch to enhance all the luscious flavors.
- All-Purpose Flour: The essential base for your cookie dough, ensuring structure.
- Cocoa Powder: Provides that deep, chocolatey taste that pairs beautifully with peanut butter.
- Black Cocoa Powder: A secret ingredient that adds a bold depth of flavor and color.
- Chocolate Fudge Pudding Mix: Gives the cookies a moist and chewy texture that’s oh-so-yummy.
- Powdered Milk: Works magic in the dough, lending it a tender crumb.
- Baking Soda: Helps the cookies rise, making them delightfully puffy.
- Granulated Sugar: Balances the flavors and adds sweetness to the dough.
- Salted Butter: Softened to add richness and a buttery flavor to the cookies.
- Eggs: One whole egg and an extra yolk ensure your cookies are wonderfully chewy.
- Reese’s Pieces and Peanut Butter Chips: These add bursts of flavor and texture. Use more for topping if you’d like!
Specific measurements for these ingredients can be found at the bottom of the article, along with a handy printable version!

How to Make Chocolate Peanut Butter Cookies
Now comes the exciting part—let’s dive into making these mouthwatering Chocolate Peanut Butter Cookies! Follow along with these step-by-step instructions, and I’ll share some handy tips along the way.
Step 1: Prepare the Peanut Butter Filling
In a medium bowl, combine ½ cup of peanut butter, 1½ cups of powdered sugar, a pinch of salt, 1 teaspoon of vanilla extract, and 1½ ounces of whole milk. Using an electric mixer or a sturdy spoon, mix until everything is well combined and smooth. Set this rich filling aside to work its magic later.
Step 2: Preheat Oven and Prepare Baking Sheet
Next, preheat your oven to 350°F. While the oven warms up, line a large baking sheet with parchment paper. This simple step prevents sticky cookies from making a mess and helps with easy removal after baking—trust me, parchment paper is a lifesaver!
Step 3: Combine Dry Ingredients
In another bowl, whisk together your dry ingredients: 2 cups of all-purpose flour, ¼ cup of unsweetened cocoa powder, ¼ cup of black cocoa powder, one box of instant chocolate fudge pudding mix, 2 tablespoons of powdered milk, ½ teaspoon of salt, and ¼ teaspoon of baking soda. Whisking ensures no lumps, creating a smooth, even texture.
Step 4: Cream Sugar and Butter
In a large mixing bowl, cream together 1 cup of granulated sugar and ½ cup of softened salted butter for about 1 minute. You want it to be light and fluffy here! This step creates a wonderful base for the cookies, providing that classic chewy texture.
Step 5: Mix in Eggs and Milk
Now, it’s time to add in your wet ingredients. Mix in 1 large room temperature egg, followed by 1 additional egg yolk, 2 ounces of whole milk, and 1½ teaspoons of pure vanilla extract. Keep mixing until everything is well combined and creamy—a surefire way to get your kitchen smelling heavenly!
Step 6: Incorporate Dry Mixture
Gradually mix half of the dry mixture into the wet mixture. Stir gently until just incorporated, then add the rest. The key is to avoid overmixing—this helps prevent tough cookies. Just stir until you can’t see any flour. Simple!
Step 7: Fold in Reese’s
With a gentle touch, fold in ¾ cup of both Reese’s Pieces and Reese’s Peanut Butter Chips. You’ll want every bite to be packed with peanut buttery goodness and chocolatey crunch, so mix until evenly distributed—no need to be rough here!
Step 8: Shape the Cookies
Scoop the dough into 9 equal portions, about 4 ounces each. Press each portion flat and shape it into a bowl, just like making a little cup. Now, place a 1-ounce ball of the peanut butter filling into the center. Fold the dough around the filling and roll it into a smooth ball. Isn’t it fun to create those little surprise centers?
Step 9: Bake the Cookies
Place each cookie on the prepared baking sheet, giving them enough space to spread (about 3 to 4 inches apart). Pop them into your preheated oven and bake for 10 to 12 minutes. You’ll know they’re ready when the edges are set, but the tops still look a bit matte. Keep an eye on them—they can go from perfect to overdone quickly!
Step 10: Cool Before Serving
Let those delicious cookies cool on the pan for about 15 minutes before transferring them to a wire rack. This cooling session allows them to firm up a bit, ensuring every bite is perfectly chewy and full of flavor. Patience is key, but I promise the wait is worth it!
Tips for Success
- Make sure all your ingredients are at room temperature for better mixing.
- Check your baking soda’s freshness—old baking soda can lead to flat cookies!
- Press the cookies gently before baking to ensure a perfect shape.
- Use a cookie scoop for consistent portion sizes, which helps with even baking.
- Store leftover cookies in an airtight container to keep them soft and fresh.
Equipment Needed
- Mixing Bowls: Use a variety of sizes for convenience—glass or metal work great.
- Electric Mixer: Hand mixer or stand mixer makes blending easy. A good whisk will do if you want a workout!
- Baking Sheet: A standard cookie sheet is perfect; line it with parchment paper.
- Measuring Cups and Spoons: Essential for accurate measurements—consider adjustable measuring cups for dry ingredients.
- Cooling Rack: Helps cookies cool evenly; if not available, a plate will suffice!
Variations
- Dairy-Free: Swap out the butter and milk for plant-based alternatives, like coconut oil and almond milk.
- Gluten-Free: Use a gluten-free flour blend to make these cookies suitable for those with gluten sensitivities.
- Nut-Free: Substitute the peanut butter with sun butter or a seed butter for a nut-free option that still packs flavor!
- Mint Chocolate: Add mint extract to the dough for a refreshing twist; it pairs wonderfully with the chocolate and peanut butter.
- Chili Chocolate: Spice things up by adding a pinch of cayenne or chili powder to the cookie dough for a surprising kick!
Serving Suggestions
- Iced Milk: Serve with a tall glass of cold milk to complement the rich flavors.
- Coffee: Enjoy alongside a warm cup of coffee or espresso for a delightful pairing.
- Presentation: Arrange cookies on a colorful platter and sprinkle with extra Reese’s for a festive touch.
- Ice Cream: Top with a scoop of vanilla ice cream for a scrumptious dessert experience.
- Chocolate Drizzle: Drizzle melted chocolate over cookies for an elegant finishing touch.
FAQs about Chocolate Peanut Butter Cookies
Let’s tackle some common questions about these delectable Chocolate Peanut Butter Cookies. I know you might have a few queries, so here are some answers to help streamline your baking adventure!
Can I freeze Chocolate Peanut Butter Cookies?
Absolutely! You can freeze the cookie dough before baking. Just scoop the shaped balls onto a baking sheet, freeze until firm, and then transfer to a freezer bag. Bake directly from frozen when you’re ready—perfect for last-minute cravings!
How do I store leftover cookies?
Store your cookies in an airtight container at room temperature. They’ll stay soft and chewy for several days, but if they last that long! You can also pop one in the microwave for a few seconds to warm it up again. Delicious!
Can I replace the Reese’s with something else?
Yes, you can! Feel free to swap in your favorite chocolate chips, nuts, or dried fruit. The choice is yours! Just keep in mind that using peanut butter chips will enhance that fantastic peanut flavor.
What can I substitute for eggs in this recipe?
If you need an egg substitute, try using flaxseed meal or chia seeds mixed with water. Just mix 1 tablespoon of either with 2.5 tablespoons of water, let it sit for 5 minutes, and it’s good to go. A ripe banana or applesauce can also do the trick!
Are these cookies gluten-free?
The original recipe uses all-purpose flour, but you can easily make them gluten-free by substituting with a gluten-free flour blend. Make sure to check the other packaged ingredients like pudding mix for any hidden gluten. Happy baking!
Final Thoughts
Whenever I whip up these Chocolate Peanut Butter Cookies, I can’t help but smile. The kitchen fills with that unmistakable aroma that invites everyone in. They are a sweet hug on a plate, whether enjoyed with family during movie night or shared with friends over coffee. This recipe is about more than just cookies; it’s about creating memories and savoring the small joys in life. So, roll up your sleeves and indulge in the delightful process of baking. I promise, with each bite, you’ll feel the love and comfort that only homemade treats can provide!