
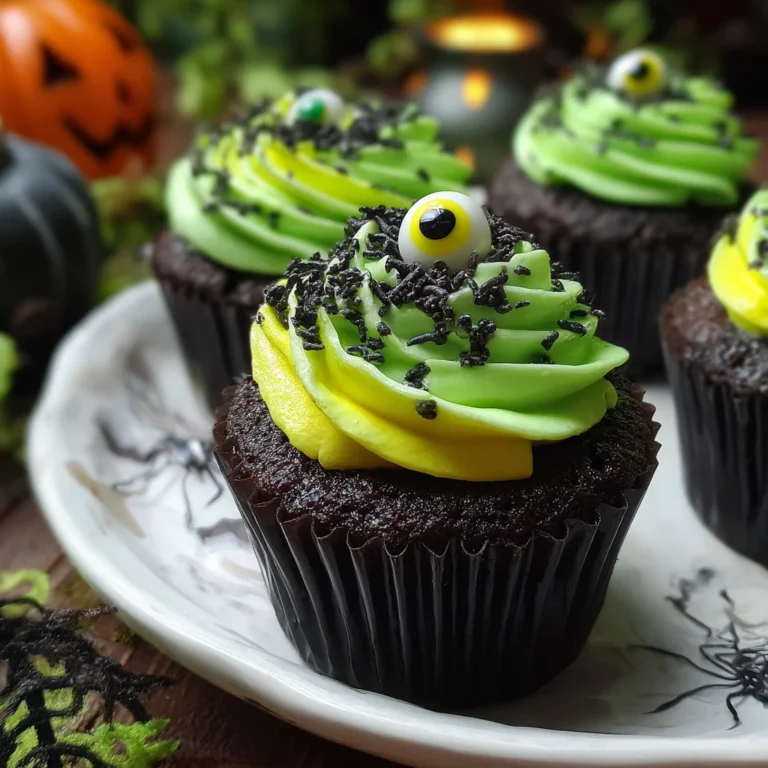
Introduction to Halloween Slime Cupcakes
As the leaves turn and the air gets crisp, the excitement of Halloween creeps in. If you’re a busy mom or professional like me, you know how challenging it can be to whip up fun treats that delight the family. These Halloween Slime Cupcakes are an absolute game-changer! They’re not only delicious but also visually spooky, making them perfect for Halloween parties or family gatherings. Plus, the vibrant colors and custard filling create a festive surprise that will impress your loved ones. Trust me, they’ll keep coming back for more!
Why You’ll Love This Halloween Slime Cupcakes
These Halloween Slime Cupcakes are a hit for so many reasons! They’re quick to make, which is a lifesaver on those busy days. The combination of fluffy chocolate sponge and gooey custard is simply irresistible. Plus, decorating them can be a fun family activity, bringing everyone into the kitchen. With just a few ingredients, you can create spooky treats that taste fantastic and look adorable. What’s not to love?
Ingredients for Halloween Slime Cupcakes
To create these delightful Halloween Slime Cupcakes, you’ll need a handful of essential ingredients that come together to create both flavor and fun!
- Baking spread or butter: The base of your cupcake batter for a rich, moist texture.
- Caster sugar: This fine sugar dissolves easily, giving your cupcakes a delightful sweetness.
- Large eggs: They bind the ingredients while adding moisture, producing a fluffy sponge.
- Vanilla extract: A flavor enhancer that brings warmth and depth to your cupcakes.
- Self-raising flour: It does all the heavy lifting by helping your cupcakes rise and stay light.
- Black food coloring: This spooky addition gives your cupcakes their signature Halloween hue.
- Unsalted butter: Essential for making your buttercream smooth and creamy.
- Icing sugar: For the buttercream, it provides the sweetness and fluffy texture.
- Milk: A splash helps achieve the perfect consistency in your buttercream!
- Green and yellow food coloring: For creating the vibrant slime effect on top of the cupcakes.
- Tinned custard: The gooey filling that adds a surprise element, making it fun for the kids.
- Candy eyes: These whimsical decorations bring your cupcakes to life!
- Green sprinkles: For a final festive touch that enhances the spooky theme.
For precise amounts, check out the recipe at the bottom of this article, where all ingredients are listed clearly and available for printing!
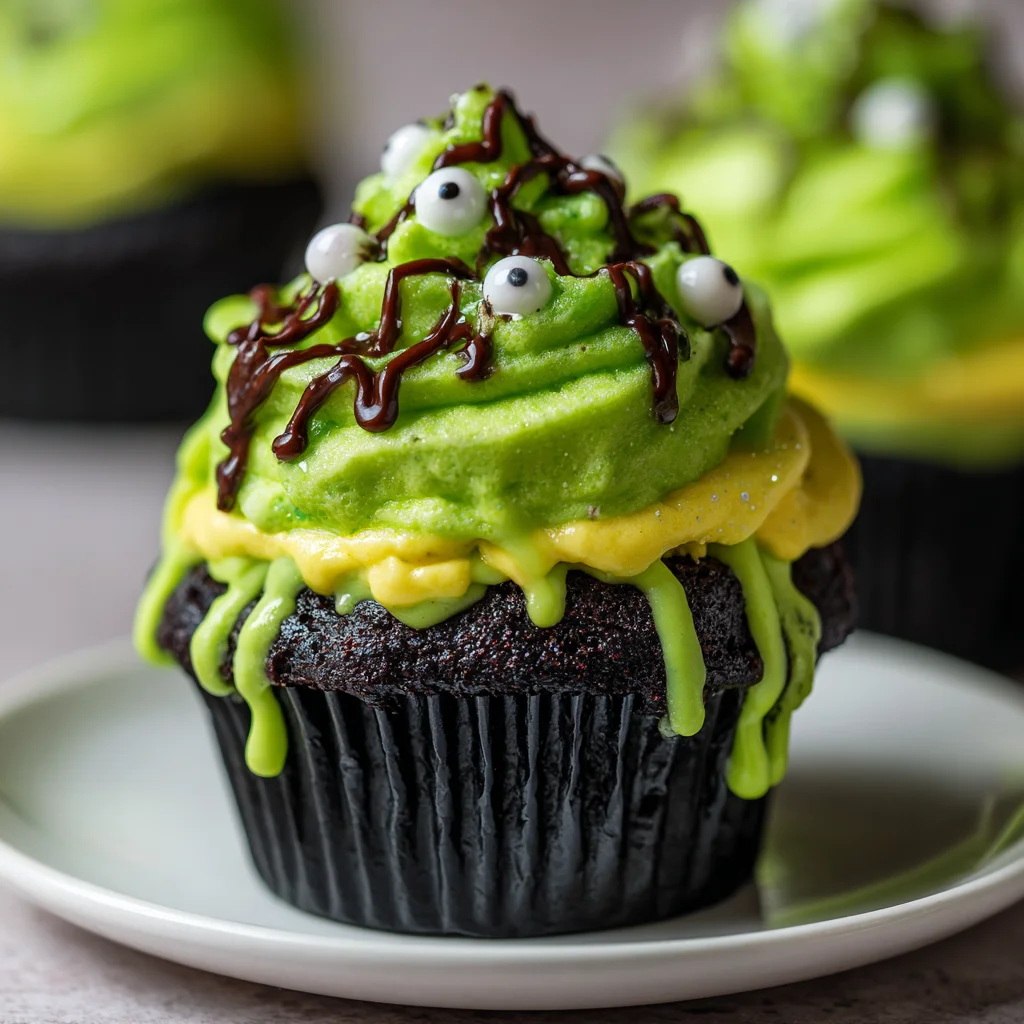
How to Make Halloween Slime Cupcakes
Making these Halloween Slime Cupcakes is easier than you might think! With a few steps, you’ll have spooktacular treats that taste as good as they look. Let’s dive into the fun!
Step 1: Preheat the Oven
First things first, let’s get the kitchen warm and ready. Preheat your oven to 140C Fan/325F/Gas Mark 3. This is crucial for ensuring your cupcakes rise beautifully. While you’re at it, line a cupcake tin with black cupcake cases. This adds an extra spooky touch!
Step 2: Prepare the Cupcake Batter
In a large bowl, mix the softened baking spread and caster sugar. Use an electric mixer for about 5 minutes until it’s fluffy and light. This step is key for that airy cupcake texture. Next, crack in the eggs and add vanilla extract. Whisk these together until blended smoothly!
Step 3: Incorporate the Black Food Coloring
Now it’s time to bring in the spooky color! Gently fold in the self-raising flour until just combined. Add the black food coloring and mix well. Don’t be shy; you want a vibrant, eerie hue! Just be careful not to over-mix—it’s like crafting a potion; you want it just right!
Step 4: Bake the Cupcakes
Now you can divide the batter evenly among the cupcake cases. Aim for about two-thirds full, so they don’t overflow. Pop them into the oven and bake for 25-30 minutes. Check them by inserting a skewer into the center; it should come out clean. Once done, let them cool on a rack—patience is key!
Step 5: Hollowing Out for Slime Filling
Once your cupcakes are completely cool, it’s time for the fun part! Use a cupcake corer or a small knife to create holes in the center of each cupcake. Don’t go too deep! We want enough space to hold the custard without risking a cupcake collapse.
Step 6: Preparing the Slime Custard Filling
Take that creamy tinned custard and mix in a few drops of green food coloring. The goal is to achieve a oozy, slime-like appearance—how fun is that? Spoon this vibrant custard into the hollowed cupcakes, filling each hole generously. A little extra never hurt!
Step 7: Make the Vibrant Buttercream
Next, let’s whip up a fluffy buttercream! In a bowl, beat the softened butter with icing sugar. Gradually add milk, vanilla extract, and a mix of green and yellow food coloring. Whip until it’s light and airy. Adjust with more milk if it’s too thick. This colorful frosting is about to make your cupcakes pop!
Step 8: Decorate and Serve
Using a piping bag (or a spoon works just as well), generously top each cupcake with that vibrant buttercream. Let your creativity run wild—don’t forget to add those candy eyes and green sprinkles for that spooky effect. Finally, place them on a fun platter and watch everyone’s faces light up!
Tips for Success
- Always allow cupcakes to cool completely before filling to avoid a messy spill.
- Adjust food coloring to suit your desired “slime” brightness; a little goes a long way.
- If frosting is too stiff, simply add a splash of milk until it’s spreadable.
- For added flair, consider using kids’ favorite sprinkles to customize their cupcakes.
- Encourage family involvement in the decorating process—make it a fun activity!
Equipment Needed
- Cupcake tin: A standard tin works, but silicone molds add a fun twist!
- Electric mixer: A great time-saver, though a whisk will do in a pinch.
- Cupcake corer: Handy for filling, or use a small knife instead.
- Piping bag: Perfect for frosting, but a ziplock bag with a corner cut can work!
Variations of Halloween Slime Cupcakes
- Chocolate Delight: Swap half of the self-raising flour with cocoa powder for rich chocolate cupcakes. The dark color adds to the spooky theme!
- Gluten-Free Option: Use a gluten-free all-purpose flour blend instead of regular flour. Your gluten-free friends will appreciate the treat!
- Vegan Version: Substitute the eggs with flaxseed meal (1 tablespoon flaxseed mixed with 3 tablespoons water per egg) and use a plant-based butter for a delightful vegan spin.
- Fruit Filling: Instead of custard, try a fruity filling with green apple or lime curd for a refreshing twist in the center.
- Lower Sugar Option: Use less sugar in the batter and icing, or try a sugar substitute like stevia for a lighter version.
Serving Suggestions for Halloween Slime Cupcakes
- Spooky Drinks: Pair these cupcakes with a dark grape soda or refreshing green punch for a themed beverage.
- Festive Platter: Arrange the cupcakes on a Halloween-themed platter. Add plastic spiders or fake cobwebs for extra flair.
- Serving with Ice Cream: A scoop of vanilla or rainbow sherbet on the side makes for a delightful contrast.
- Personalized Toppers: Use fun Halloween-themed cupcake toppers to make the treats even more festive.
FAQs about Halloween Slime Cupcakes
Got questions? Don’t worry; I’ve got answers! Here are some common queries about these fun Halloween Slime Cupcakes.
Can I make the cupcakes ahead of time?
Absolutely! You can bake them a day in advance. Just store them in an airtight container. Wait to fill and frost them until you’re ready to serve for the freshest taste!
What if I don’t have black food coloring?
No problem! You can use dark cocoa powder instead, or consider a mix of dark blue and red food coloring to achieve a spooky shade.
Can I make a larger batch?
Definitely! Simply double the ingredients and bake in batches. Just keep an eye on the baking time as larger quantities may take slightly longer to cook through.
How do I store leftover cupcakes?
Store any leftovers in an airtight container at room temperature. Enjoy them within three days for the best flavor and freshness!
Can kids help make these cupcakes?
Yes! Involving the kids in decorating or filling the cupcakes can be a delightful family activity. Just keep an eye on them during the baking process!
Final Thoughts
Creating these Halloween Slime Cupcakes isn’t just about baking; it’s about making memories. I love how they light up faces with both their vibrant colors and surprising fillings. Watching my kids’ eyes widen as they reveal the slime custard is pure joy. Plus, the kitchen becomes a hub of laughter and creativity as we decorate together. Whether it’s for a classroom party or just a spooky family night, these cupcakes add a sprinkle of fun to any occasion. So roll up your sleeves and enjoy the delightful chaos that comes with baking these treats!