
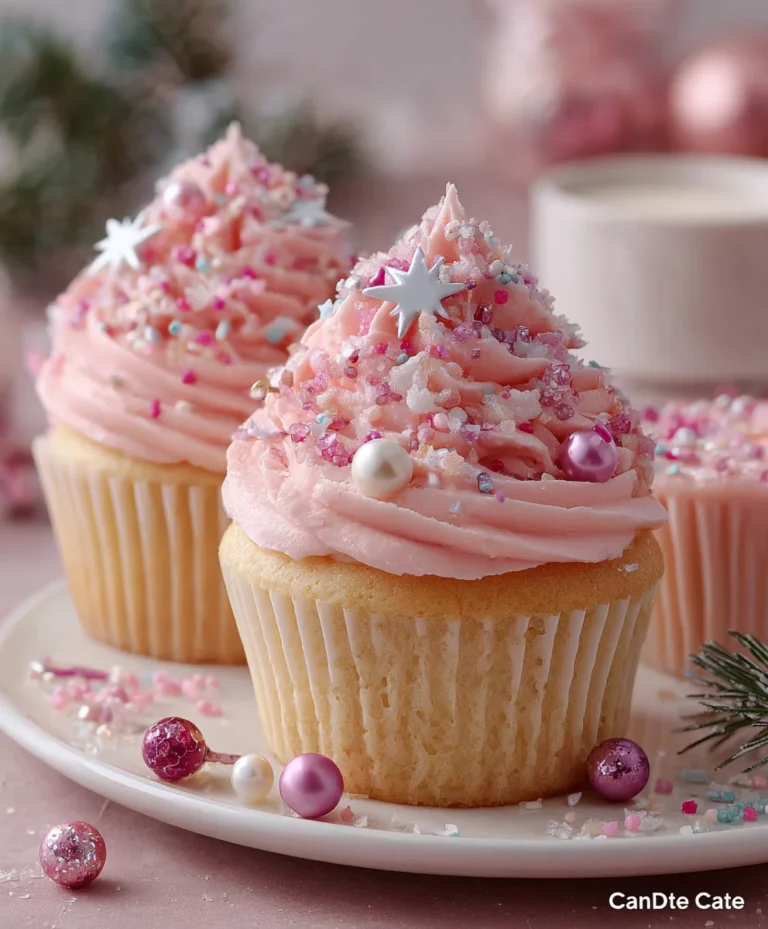
Introduction to Pink Christmas Tree Cupcakes
Ah, the holiday season! It’s all about joy, laughter, and delicious treats. If you’re looking to add a sprinkle of magic to your celebrations, these Pink Christmas Tree Cupcakes are just the ticket! They’re not only delightful to look at but also incredibly simple to whip up. In a world where busy days can leave us feeling frazzled, this recipe serves as a quick solution. Picture a cupcake topped with swirls of pastel pink frosting, evoking cozy, festive vibes. Your loved ones will adore these sweet little trees, making them a cheerful centerpiece for any holiday gathering.
Why You’ll Love This Pink Christmas Tree Cupcakes
Let’s face it, the holiday season can be hectic! These Pink Christmas Tree Cupcakes are your go-to solution for stress-free baking. With just a few simple ingredients and steps, you can create something stunning. The delightful taste and fluffy texture of these cupcakes are sure to impress family and friends. Plus, the vibrant colors add an extra layer of holiday cheer to any table, making them a hit at parties!
Ingredients for Pink Christmas Tree Cupcakes
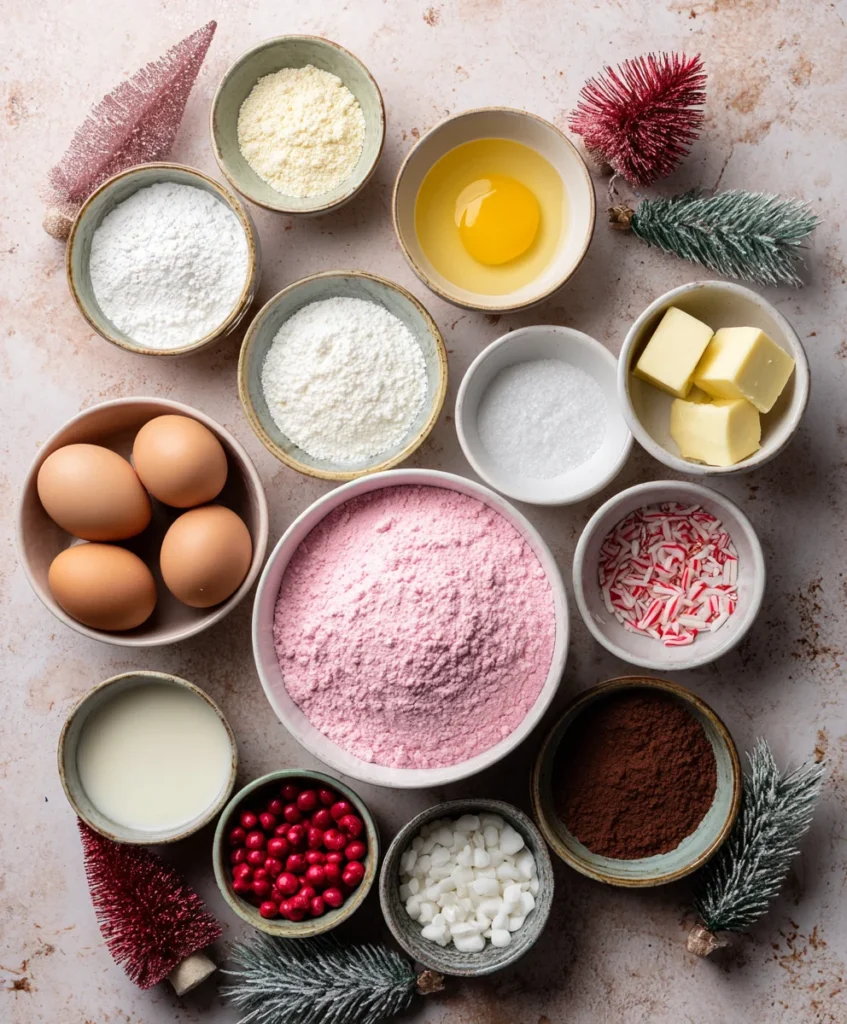
Now, let’s gather everything we need to create these festive delights! Here’s what you’ll need for the Pink Christmas Tree Cupcakes:
- All-purpose flour: This is the base of our cupcakes, providing structure and texture. Feel free to substitute with gluten-free flour for a GF version!
- Granulated sugar: This sweetener not only adds flavor but also helps achieve that lovely, fluffy texture.
- Baking powder: A leavening agent that gives our cupcakes that perfect rise, keeping them light and airy.
- Salt: Just a pinch enhances all the flavors, balancing the sweetness beautifully.
- Unsalted butter: Whipped to perfection, it creates that rich, moist cupcake that we all adore. Make sure it’s softened for easy mixing! If you’re dairy-free, coconut oil is an excellent alternative.
- Eggs: These provide moisture and binding. They contribute to the overall richness of the cupcakes. For a vegan twist, consider using flax eggs or applesauce.
- Milk: This adds moisture and a hint of sweetness. You can use any milk you prefer, including almond or oat milk.
- Vanilla extract: A classic flavor enhancer, it adds a warm, aromatic essence to our cupcakes.
- For the buttercream:
- Unsalted butter: Used again to create a creamy frosting that pairs perfectly with our sweet cupcakes.
- Powdered sugar: This gives our buttercream its sweetness and smooth texture. Adjust the amount based on how thick you want your frosting.
- Milk or heavy cream: Just a splash helps to achieve a silky texture that’s easy to pipe!
- Pink gel food coloring: This is key for achieving that lovely pastel shade. Gel food coloring gives vibrant results without altering the frosting consistency.
- Pink + white pearl sprinkles: These delightful decorations add a touch of sparkle. Use them to create festive ornament-like accents.
- Pink star toppers: Whether candy or decorative paper picks, these are the crowning glory of our Christmas tree cupcakes!
For the exact measurements of each ingredient, scroll down to the recipe card at the bottom of the article. Happy baking!
How to Make Pink Christmas Tree Cupcakes
Now, let’s embark on our delicious journey to create these delightful Pink Christmas Tree Cupcakes! With simple steps and a bit of love, you’ll be able to whip up a festive treat that will surely be the star of your holiday celebrations. Let’s get started!
Step 1: Preheat the Oven and Prepare the Muffin Tin
First, preheat your oven to 350°F (175°C). This ensures your cupcakes bake evenly, helping them rise beautifully. While the oven warms up, line a muffin tin with cupcake liners. This step is crucial as it makes for easy removal later, preventing any cupcake catastrophes!
Step 2: Whisk Dry Ingredients
In a mixing bowl, whisk together your flour, baking powder, and salt. To prevent lumps, sift the flour first if your whisk isn’t cutting it. This creates a smooth batter, assuring your cupcakes will turn out light and fluffy. Trust me, no one wants a lumpy surprise!
Step 3: Cream Butter and Sugar
In another bowl, beat your softened butter and granulated sugar. Do this for about 3-4 minutes. This is where the magic happens! The creaming process incorporates air, creating a fluffy texture for your cupcakes. The lovely aroma of butter and sugar filling your kitchen is a bonus!
Step 4: Add Eggs and Vanilla
Now, add the eggs one at a time, mixing well after each addition. Follow with your vanilla extract. This simple step gives depth to the flavor, elevating your cupcakes from ordinary to extraordinary. The mixture should look creamy and rich at this point!
Step 5: Combine Wet and Dry Ingredients
Gently add your dry ingredient mixture into the wet ingredients. Alternate with the milk to make it easier to combine. Be cautious not to overmix! This ensures your cupcakes remain tender and soft. Just mix until you see no flour streaks, and keep the batter light.
Step 6: Fill Cupcake Liners
Using a scoop or spoon, fill each cupcake liner about two-thirds full. This gives your cupcakes room to rise without overflowing. It’s a fine balance! The last thing you want is a cupcake tsunami in your oven.
Step 7: Bake and Cool
Pop your cupcake tray into the oven and bake for 16–20 minutes. You’ll know they’re done when a toothpick inserted in the center comes out clean. Once baked, let them cool in the tin for a few minutes before transferring them to a wire rack to cool completely.
Step 8: Make the Buttercream
In a new bowl, beat your softened unsalted butter for about 2 minutes until creamy. Gradually add the powdered sugar. This can get messy, so keep your mixer on low at first. Add vanilla and a splash of milk as needed. Beat until you reach a smooth, pipable consistency!
Step 9: Tint and Pipe Frosting
Now comes the fun part! Use pink gel food coloring to tint your frosting to that beautiful pastel shade. Start with a little, then add more until you achieve your desired color. Fit a piping bag with a large star tip, and get ready to pipe those delicious swirls in a tree-like shape!
Step 10: Decorate Cupcakes
Here’s where your creativity shines! Pipe tall swirls on top of your cooled cupcakes, mimicking a Christmas tree. Add pearl sprinkles as ornaments, and crown your sugary trees with the pink star toppers. Feel free to personalize them—every cupcake can have its own festive flair!
Tips for Success
- Always use softened butter for easier mixing; it makes a difference!
- Don’t overmix your batter—just mix until combined to keep cupcakes fluffy.
- Keep an eye on baking time; ovens can vary greatly!
- Let cupcakes cool completely before frosting to prevent melting.
- For color consistency, add gel food coloring a little at a time until you reach your desired shade.
Equipment Needed
- Muffin tin: A standard muffin tin works well; use a silicone one for easy removal.
- Cupcake liners: These help keep the cupcakes intact; you can choose festive designs!
- Mixing bowls: Have a set in various sizes for convenience.
- Whisk and mixer: Either a handheld mixer or a stand mixer makes the job easier.
- Piping bag and star tip: A zip-top bag with a corner cut can work in a pinch!
Variations for Pink Christmas Tree Cupcakes
- Chocolate Version: Substitute half of the flour with cocoa powder for a rich chocolate cupcake base that pairs beautifully with pink frosting!
- Vanilla Bean: For a gourmet touch, add real vanilla bean seeds to the batter for an aromatic boost, enhancing the cupcake flavor.
- Gluten-Free: Use gluten-free all-purpose flour instead of regular flour to make these cupcakes safe for those with gluten sensitivities.
- Dairy-Free: Replace unsalted butter with coconut oil or dairy-free butter, and use almond milk or oat milk for the batter and frosting.
- Mini Cupcakes: Create mini versions by using a mini muffin tin! Adjust the baking time to 10-12 minutes for these adorable treats.
Serving Suggestions
- Pair these Pink Christmas Tree Cupcakes with a warm cup of spiced apple cider for a cozy drink option.
- Serve them on a festive platter adorned with greenery or twinkling lights to create an enchanting display.
- Complement the sweetness with savory snacks like cheese and charcuterie for balanced flavors.
FAQs about Pink Christmas Tree Cupcakes
Can I make Pink Christmas Tree Cupcakes ahead of time?
Absolutely! You can bake the cupcakes a day in advance and store them in an airtight container. Just frost them the morning of your event to keep that delightful frosting fresh and beautiful.
What can I use instead of pink gel food coloring?
If you don’t have pink gel food coloring, consider using natural alternatives like beet juice or raspberry puree for a pop of color. Remember, results may vary in shade!
How can I store leftover cupcakes?
To keep your cupcakes fresh, store them in an airtight container at room temperature for up to three days. You can also refrigerate them for up to a week, although that might slightly change the texture.
Can I freeze these cupcakes?
Yes, you can freeze the cupcakes! Just ensure they’re completely cool before wrapping them tightly in plastic wrap and placing them in a freezer-safe container. They’ll stay fresh for about three months.
Are there any other fun decorating ideas for Pink Christmas Tree Cupcakes?
Definitely! Besides pearl sprinkles and star toppers, you can use edible glitter, mini candy canes, or even shredded coconut dyed green for a frosty effect. These ideas add a little extra magic to your festive creations!
Final Thoughts
Making Pink Christmas Tree Cupcakes is truly a joyous experience! These delightful treats not only fill your home with the warm aroma of baked goods but also bring smiles to the faces of your loved ones. Baking them together can become a cherished family tradition. Every swirl of frosting and sprinkle of decoration showcases your creativity. Plus, they offer an effortless way to brighten up any holiday gathering. So, embrace the festive spirit and whip up a batch: the taste, laughter, and memories you create will be the sweetest gift of all this season!