
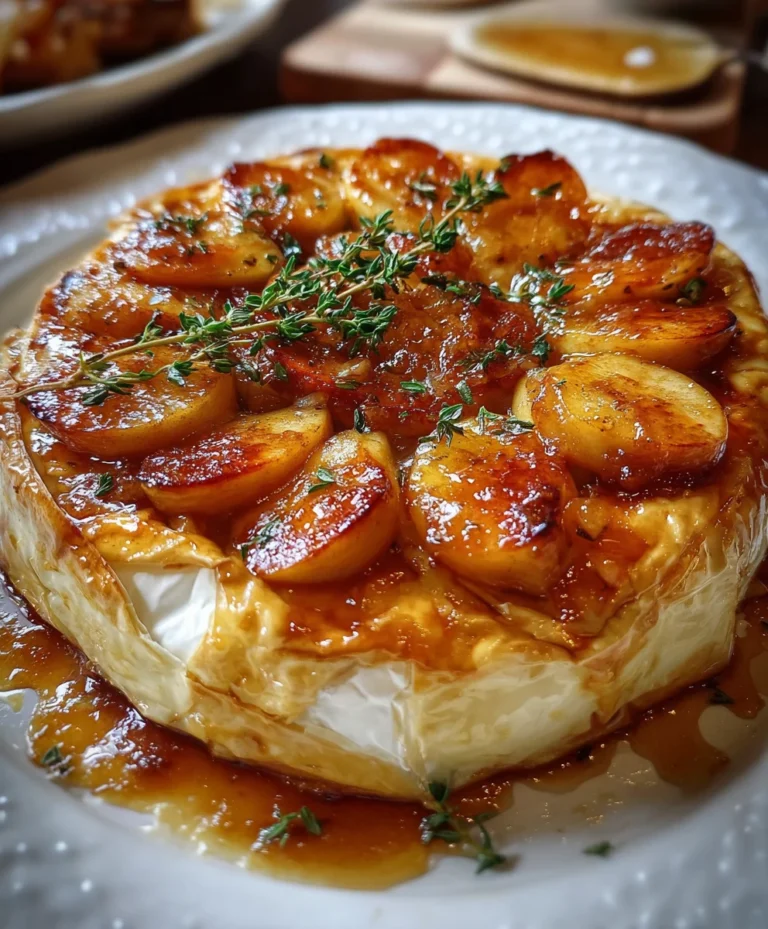
Introduction to Baked Brie with Caramelized Apples
Sometimes, it feels like life moves at lightning speed, doesn’t it? Between work, kids, and everyday chaos, finding time to unwind can be a challenge. That’s where my recipe for Baked Brie with Caramelized Apples comes in. This delectable treat is not just a cheesy indulgence; it’s a warm hug in food form. Perfect for busy nights or celebrations, it’s an effortless way to impress while treating yourself. Trust me, even the pickiest eaters will delight in this sweet and savory masterpiece. With just a few simple ingredients, you can create something truly memorable and comforting.
Why You’ll Love This Baked Brie with Caramelized Apples
This Baked Brie with Caramelized Apples is a dream come true for busy moms and professionals! It’s quick to whip up, taking just over an hour from start to finish, and it’s a showstopper at gatherings. The creamy brie pairs beautifully with the sweet, caramelized apples, delivering a taste that’s as comforting as it is delicious. Whether it’s a family get-together or a cozy night in, this dish satisfies every time!
Ingredients for Baked Brie with Caramelized Apples
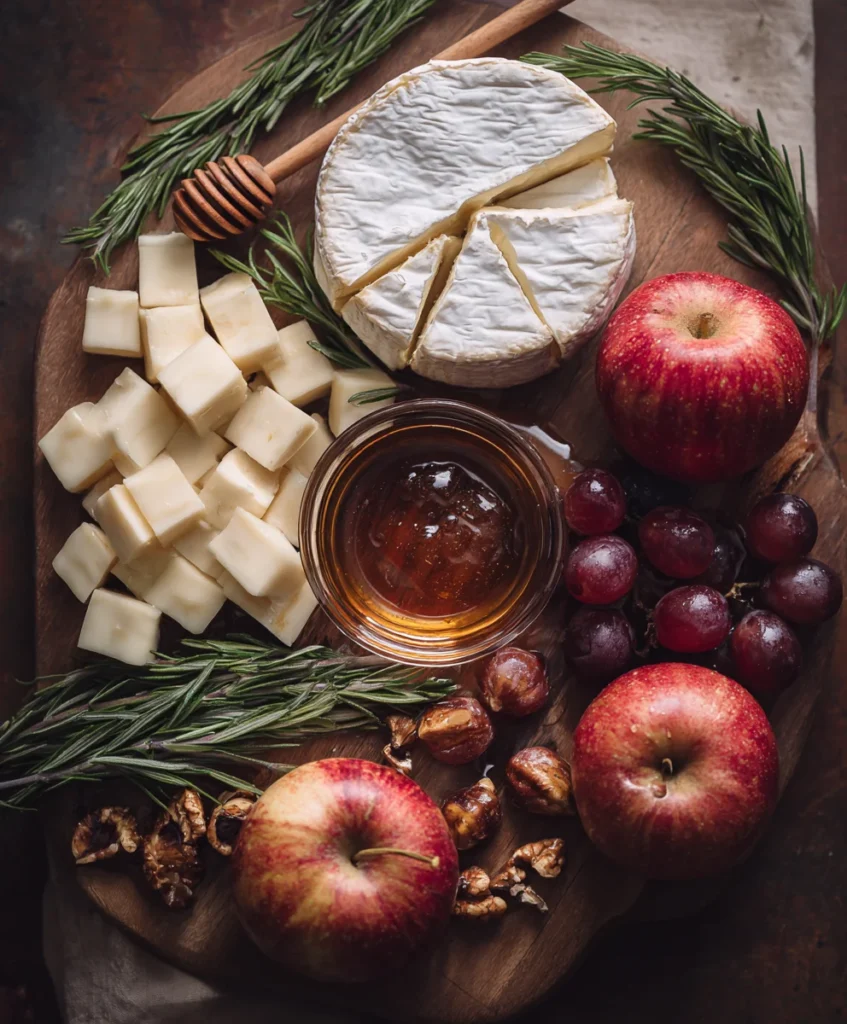
Getting the ingredients ready for Baked Brie with Caramelized Apples is half the fun! Here’s what you’ll need:
- Honeycrisp apples: These are sweet and crisp, perfect for caramelization. You can use any sweet variety if you prefer.
- Salted butter: It helps to create a rich caramel and enhances the flavors of the apples.
- Maple syrup: This adds an extra layer of sweetness and depth, complementing the apples and brie beautifully.
- Puff pastry: This creates a flaky, golden crust that wraps everything together. Be sure it’s well-thawed before use!
- Brie: The star of the show! Its creamy texture melts perfectly with the apples.
- Apple butter or fig preserves: Spread over the brie, these sweet toppings add flavor and moisture.
- Beaten egg: For brushing on the pastry, it gives a lovely golden finish.
- Coarse sugar: A sprinkle adds a delightful crunch to the pastry.
- Fresh thyme: It’s optional, but this adds a fragrant touch as a garnish!
Remember, the ingredients and quantities are listed at the bottom, making it easier to shop and prepare!
How to Make Baked Brie with Caramelized Apples
Creating the perfect Baked Brie with Caramelized Apples is easier than you might think! Follow these simple steps, and you’ll have a deliciously golden dish to impress at any gathering or enjoy on a quiet evening at home. Let’s dive in, shall we?
Step 1: Preheat the Oven
First things first—preheat your oven to 425°F (220°C). This step is crucial because a hot oven ensures that the puff pastry will crisp up beautifully.
Step 2: Roast the Apples
While the oven is heating, grab a baking dish. Toss together your sliced Honeycrisp apples, salted butter, and maple syrup. Coat the apples well. Pop the dish into the oven and roast for about 25 minutes. Keep an eye on them; they should be soft and caramelized, filling your kitchen with a heavenly aroma!
Step 3: Prepare the Puff Pastry and Brie
On a clean surface, lay out your thawed puff pastry. It should be rolled out to a nice rectangle; lay it flat on a parchment-lined baking sheet. Next, place the wheel of brie right in the center. Carefully, remove a small portion of the rind off the top; this allows the cheese to melt and ooze out when baked. Spread a generous layer of apple butter or fig preserves over the top—it’s like adding a sweet little blanket to the brie!
Step 4: Wrap the Brie
Now, here comes the fun part! Gently fold the edges of the puff pastry over the brie, making sure you cover it completely. It’s okay if it looks a little rustic; we want it cozy! Use your fingers to seal the edges, ensuring the pastry hugs the cheese snugly. Brush the entire pastry with a beaten egg for that gorgeous golden finish. To make it sparkle, sprinkle a bit of coarse sugar on top!
Step 5: Bake the Pastry-Wrapped Brie
Slide the entire baking sheet into the oven and let the magic happen! Bake for about 20-25 minutes. You want the pastry to turn golden brown and crisp, which is absolutely the moment you’ve been waiting for! When you see that beautiful color, take it out and let it rest for a few minutes.
Step 6: Serve with Caramelized Apples
Finally, the moment of truth! Spoon the sweet, caramelized apples right on top of the warm, baked brie. The contrast of rich flavors and textures will make everyone swoon. If you have fresh thyme, now’s the time to sprinkle it on for that extra touch of finesse. Serve it with crispy crackers or simply enjoy it on its own—the choice is yours!
And there you have it! A delightful dish of Baked Brie with Caramelized Apples that’s bound to make any occasion a little more special. Enjoy every gooey, sweet bite!
Tips for Success
Ready to elevate your Baked Brie with Caramelized Apples? Here are some quick tips for a flawless creation:
- Make sure your puff pastry is fully thawed; this helps achieve that perfect flaky texture.
- Don’t skimp on the butter; it’s key for rich flavor when caramelizing the apples.
- Let the brie rest a bit after baking for easier serving.
- Experiment with different toppings; nuts or dried fruits add a nice crunch!
Equipment Needed
Gathering your kitchen tools can make creating Baked Brie with Caramelized Apples a breeze. Here’s what you’ll need:
- Baking sheet: A regular sheet works, but a rimmed one is handy to catch any drips.
- Parchment paper: This prevents sticking and makes cleanup easier.
- Sharp knife: For slicing the apples and prepping the brie.
- Baking dish: To caramelize those sweet apples.
- Brush: For applying that lovely egg wash on the pastry.
Variations
If you’re looking to mix things up with your Baked Brie with Caramelized Apples, here are some fun alternatives to try:
- Change the fruits: Swap Honeycrisp apples for pears or peaches for a different flavor profile.
- Try different cheeses: Use camembert or goat cheese for a unique twist.
- Make it savory: Add caramelized onions or roasted garlic for an umami kick.
- Gluten-free option: Use gluten-free puff pastry to accommodate dietary needs.
Serving Suggestions for Baked Brie with Caramelized Apples
Your Baked Brie with Caramelized Apples deserves a deliciously complimentary spread. Here are some serving ideas to elevate your presentation:
- Crackers: Serve with a variety of crispy crackers for added texture.
- Fresh bread: Sliced baguette or artisanal bread pairs wonderfully with the warm cheese.
- Wine: A glass of crisp white wine enhances the flavors beautifully.
- Fruit platter: Include grapes and berries for a fresh touch alongside your indulgence.
FAQs about Baked Brie with Caramelized Apples
As you prepare to dazzle your guests with Baked Brie with Caramelized Apples, you might have a few questions. Let’s tackle some of the most common ones!
Can I make this dish ahead of time? Absolutely! You can prepare the caramelized apples a day in advance. Just store them in an airtight container in the fridge. Assemble the brie with the puff pastry just before baking to ensure maximum freshness.
What’s the best way to store leftovers? If you have any leftovers (though I doubt it!), store them in an airtight container in the fridge for up to three days. You can reheat in the oven for a few minutes to restore its wonderful gooeyness.
Can I use a different cheese? Definitely! While brie is classic, camembert or even a creamy goat cheese also works marvelously. Experiment to find your perfect match!
What temperature should this dish be served at? Baked Brie with Caramelized Apples can be served warm right from the oven or at room temperature. Both options are delicious, depending on your preference.
What should I serve with this? This dish pairs wonderfully with crisp crackers, fresh bread, or even fruit. Feel free to get creative with your accompaniments!
Final Thoughts on Baked Brie with Caramelized Apples
Baked Brie with Caramelized Apples is truly a delightful creation that brings warmth and joy to any gathering. The combination of creamy brie and sweet, caramelized apples is like a cozy embrace, perfect for sharing with loved ones or indulging after a long day. It’s comforting yet elegant, making it a go-to masterpiece for busy moms and professionals alike. Best of all, it’s incredibly easy to prepare! You’ll feel a sense of satisfaction as your guests savor each gooey, delicious bite—because nothing says “you’re special” quite like this lovely treat!