
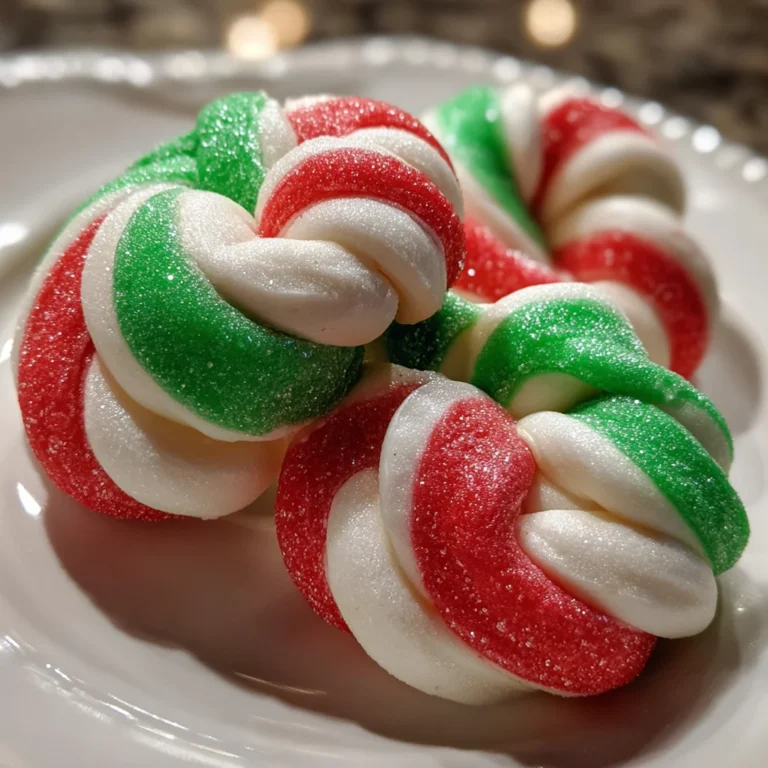
Introduction to Christmas Mints
As the holiday season approaches, I find my kitchen bustling with the scents of spices and sweets. Among my favorite creations are these delightful Christmas mints. They’re not just pretty treats; they bring smiles and warmth to my table. If you’re a busy mom or professional like me, you’ll love how quick and easy these are. With just a few simple ingredients and no baking required, you can whip up a batch to impress your loved ones or sweeten up your holiday gatherings. Let’s get into the festive spirit together!
Why You’ll Love This Christmas Mints
These Christmas mints are the perfect holiday treat for anyone short on time. They come together in just 20 minutes, and the no-bake method means no fussing with the oven. Plus, the combination of creamy, buttery goodness and refreshing peppermint is simply irresistible. Whether you’re hosting a party or looking for a thoughtful gift, these mints will leave a lasting impression without breaking a sweat!
Ingredients for Christmas Mints
Here’s what you’ll need to create these delightful Christmas mints. Each ingredient plays a unique role in achieving that creamy, dreamy texture and flavor. While I’ve listed the exact measurements at the bottom of the article for your convenience, let’s explore the essentials!
- Granulated sugar: This forms the sweet base of the mints, balancing the tanginess of the cream cheese.
- Cream cheese: The heart of our mints, cream cheese adds a rich, velvety texture. Always best at room temperature for easier mixing!
- Unsalted butter: At room temperature, butter brings a luscious creaminess, enhancing the overall flavor.
- Light corn syrup: A little sweetness and moisture come from corn syrup, helping to bind everything together.
- Peppermint extract: The star flavor! This brings that refreshing holiday taste to your mints. Feel free to adjust based on personal preference.
- Powdered sugar: This is essential for achieving the perfect dough consistency. It adds sweetness without making it grainy.
- Liquid food coloring: A few drops of green and red create festive colors that brighten up the treats. Fun way to get the kids involved!
Get ready to create a delightful batch of Christmas mints that will dazzle your family and friends! Don’t forget that all the ingredient measurements you need are conveniently available for printing at the end.
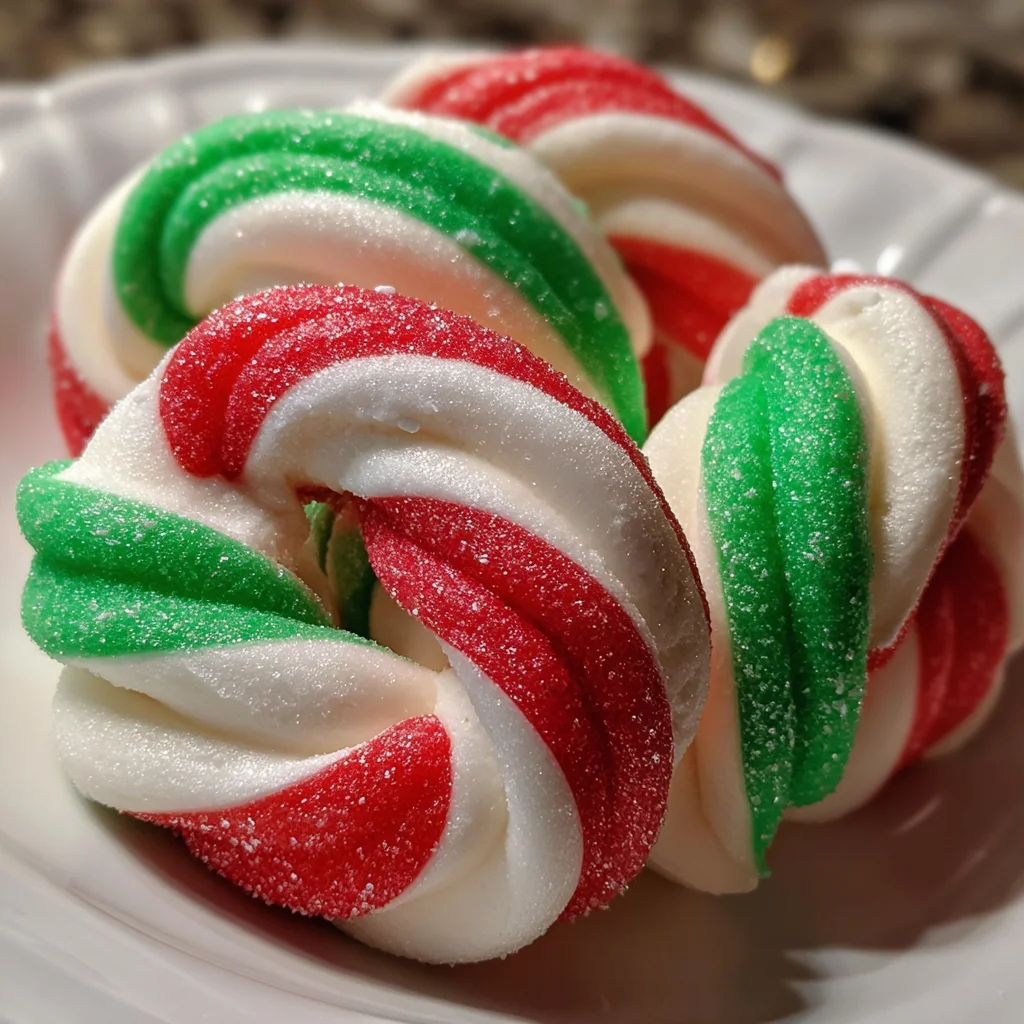
How to Make Christmas Mints
Making these festive Christmas mints is a breeze! Follow these simple steps to create delicious, no-bake confections that are sure to impress. I promise, it’s as enjoyable as it is easy. Let’s get started!
Step 1: Mix the Base
In a large mixing bowl, start by combining granulated sugar, room-temperature cream cheese, unsalted butter, light corn syrup, and peppermint extract.
Be sure to beat these ingredients together until the mixture is smooth and creamy. This is the heart of your mints, so take your time. I find using a hand mixer gives me the best results, but a sturdy spatula works too.
You want it fluffy, like a sweet holiday cloud!
Step 2: Add the Powdered Sugar
Next, slowly add the powdered sugar to the creamy mixture.
Start with 4¼ cups, mixing well until the dough begins to hold its shape.
If the dough feels sticky, just sprinkle in a bit more powdered sugar until it’s pliable.
Think of it as a fun, festive game to get the right consistency.
You want it to be easy to mold without sticking to your hands!
Step 3: Color the Dough
Now, it’s time to get colorful!
Divide your dough into three equal portions.
Leave one white, and knead green food coloring into the second piece while blending red into the last.
Work the color in until you achieve vibrant hues.
You can adjust the intensity, depending on how festive you want them! This is where a little creative flair can bring out the holiday spirit.
Step 4: Roll the Ropes
Roll each colored portion into long, thin ropes, about ½ inch thick.
The key here is uniformity; keeping them even ensures your mints look as delightful as they taste.
Don’t worry if they’re not perfect—imperfections can be charming!
Just enjoy the process and take a moment to appreciate how beautiful they start to look!
Step 5: Twist and Cut
Now it’s time for a little magic!
Twist the three ropes together gently, pressing them slightly to seal the connection.
Using a sharp knife, cut the twisted rope into ½-inch slices.
Lay them out carefully; this is where those festive colors shine. Each slice will be a tiny work of art!
Step 6: Air Dry
Finally, place your mint slices on a parchment-lined baking sheet.
Allow them to air dry for several hours, or even overnight if you can wait.
This step helps firm them up for the perfect bite.
As the aroma wafts through your kitchen, it’s a delightful reminder of the sweet celebrations ahead!
Tips for Success
- Make sure your cream cheese and butter are at room temperature for easy blending.
- Start with less food coloring; you can always add more for vibrant shades.
- Keep powdered sugar handy in case you need to adjust the dough consistency.
- Wash your hands after kneading the dough to avoid unnecessary stickiness.
- For fun, get kids involved in rolling and coloring the dough!
Equipment Needed
- Mixing bowl: A large one is best, but any deep bowl will do.
- Hand mixer or spatula: Use a hand mixer for ease, but a strong spatula works well, too.
- Sharp knife: A small paring knife is perfect for slicing the mints.
- Parchment paper: Any kitchen paper will work for lining your baking sheet.
Variations
- Chocolate Coated: Dip your mints in melted dark, milk, or white chocolate for a delightful twist.
- Nutty Flavor: Add finely chopped nuts, like almonds or walnuts, into the dough for a crunchy texture.
- Dairy-Free Option: Substitute cream cheese and butter with dairy-free alternatives such as almond or coconut cream and vegan butter.
- Flavored Extracts: For a unique flavor profile, swap peppermint extract with almond, vanilla, or even orange extract.
- Festive Sprinkles: Roll finished mints in holiday-themed sprinkles for extra flair and color!
Serving Suggestions
- Hot Cocoa: Pair these mints with steaming cups of hot cocoa for a cozy treat.
- Holiday Platters: Arrange mints on a festive platter alongside cookies and other sweets.
- Gift Boxes: Stack mints in decorative boxes for the perfect homemade gift.
- Minty Coffee: Add a mint to your coffee as a sweet stir-in during brunch gatherings.
- Party Favors: Wrap mints in cellophane bags to share with guests at holiday parties.
FAQs about Christmas Mints
Here are some common questions I’ve come across about these delightful Christmas mints. Hopefully, these answers will help clear up any doubts you may have!
Can I use flavored extracts other than peppermint?
Absolutely! You can swap peppermint extract for almond or vanilla extract for a unique twist. It’s a fun way to experiment and discover new flavors!
How should I store the mints?
To keep your Christmas mints fresh, store them in an airtight container at room temperature. They should last for about two weeks—if they last that long!
Can I freeze these mints?
Yes, you can freeze them! Just layer the mints between parchment paper in an airtight container to prevent sticking. When you’re ready to enjoy, simply thaw them at room temperature.
What if the dough is too sticky?
If your dough feels too sticky, don’t worry! Just add more powdered sugar a little at a time until it reaches a smooth, pliable consistency.
Can kids help make Christmas mints?
<pDefinitely! Making mints is a great holiday activity for kids. They can help with coloring, rolling, and even cutting—just keep an eye on those sharp knives!
Final Thoughts
Creating these sweet Christmas mints has become a cherished holiday tradition in my home. They bring laughter, joy, and a sprinkle of magic to our season. Each mint tells a story of family gatherings, cozy nights, and festive celebrations. As I roll the ropes of dough and twist them together, I’m reminded that the best memories are often made in the kitchen, right alongside loved ones. So, gather your family, let the spirit of the holidays inspire you, and enjoy the simple pleasures of making these delightful treats. After all, the sweetness of Christmas is in every bite!