
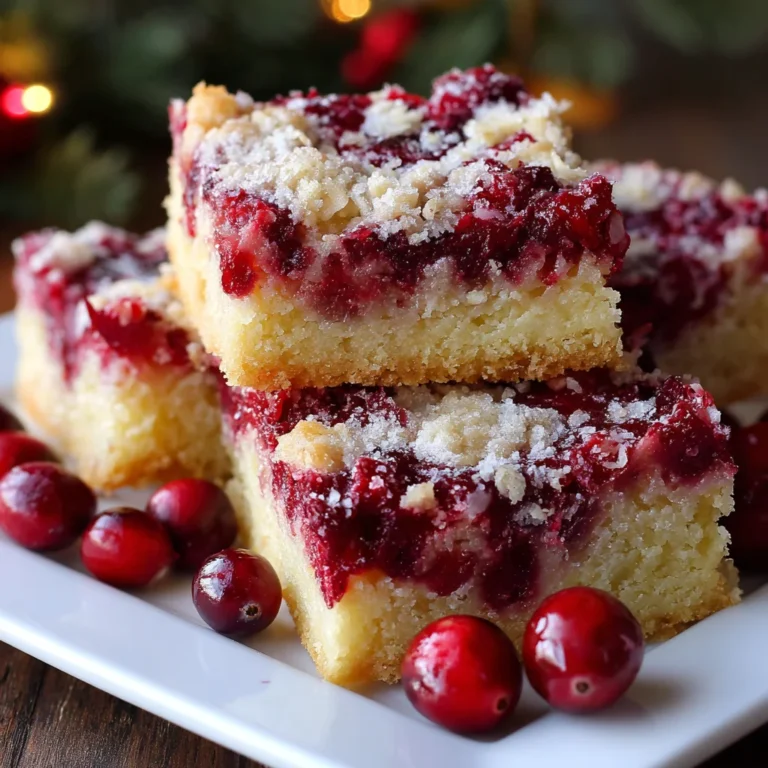
Introduction to Cranberry Bars
Ah, Cranberry Bars! They’re like little bites of joy wrapped in a buttery, crumbly crust. As a busy mom, I know how scarce time can be, but these bars bring sweetness without stealing all your afternoon. Picture gathering loved ones around the table, the warm aroma of baking filling the room. It’s a treat that says, “I care!” Perfect for a quick solution on a hectic day or a special dessert for those moments that deserve a celebration. Trust me, once you try these bars, they’ll turn into your go-to recipe for any occasion!
Why You’ll Love This Cranberry Bars
These Cranberry Bars are a lifesaver for anyone juggling the chaos of daily life. They whip up quickly, making them a fantastic last-minute dessert. The combination of a sweet and tart filling enveloped in a crumbly crust is downright delightful. Plus, they impress kids and adults alike! You can even enjoy them as a snack during busy afternoons. Honestly, once you try them, they’ll quickly become a family favorite.
Ingredients for Cranberry Bars
Let’s gather our ingredients for these delightful Cranberry Bars! Here’s what you’ll need:
- Sugar Cookie Mix: This pre-made mix saves time and delivers the sweet crumbliness we all love in dessert.
- Salted Butter: Melted for easy mixing, it brings richness and depth to the crust, making every bite heavenly.
- Egg: A large egg binds everything together, adding moisture for that lovely texture we crave.
- All-Purpose Flour: Just a hint boosts the structure of the bars, providing the perfect base for our filling.
- Quick Oats: These add a nice chewiness, creating a hearty feel that balances out the sweetness.
- Ground Cinnamon: A pinch brings warmth and a touch of spice that elevates the flavors perfectly.
- Frozen Cranberries: Frozen berries are handy and reliable, giving that lovely tartness we adore without the fuss.
- Granulated Sugar: It sweetens up the cranberry filling, striking a beautiful balance between tart and sweet.
- Cornstarch: This thickener keeps our filling from becoming too runny, ensuring each bar holds its shape.
- Cranberry Juice: Just a splash enhances the cranberry flavor, creating a juicy burst in every bite.
For exact quantities, you can find them at the bottom of the article, and they’re ready for printing!
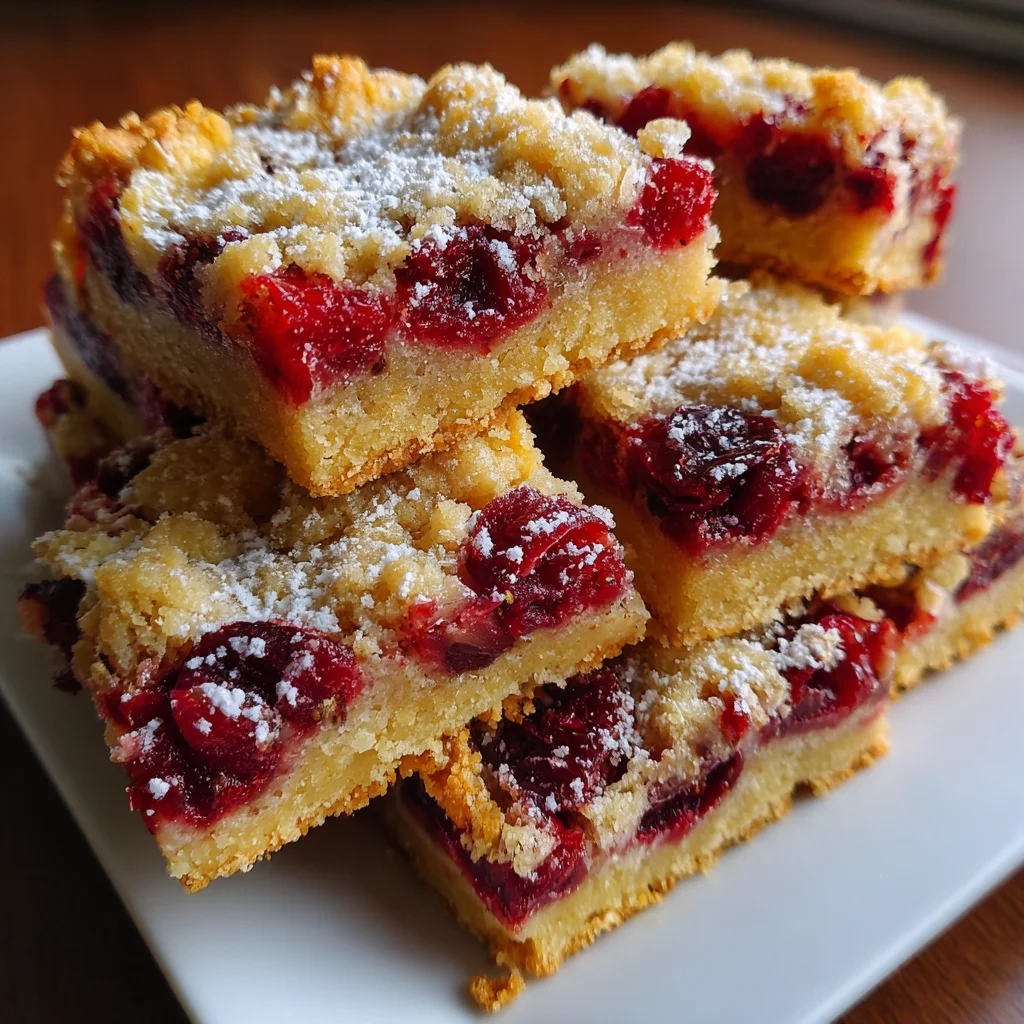
How to Make Cranberry Bars
Preheat the Oven & Prepare the Baking Dish
First things first, preheat that oven to 350°F. This step is essential for even baking. A properly preheated oven ensures that our Cranberry Bars rise and sets perfectly. As you wait, grab a 9×13 inch baking dish. Spray it with cooking spray and line it with parchment paper. This makes it easy to lift the bars out later and allows for simple cleaning. Trust me, you’ll thank yourself later when those luscious bars pop out smoothly!
Make the Crust Mixture
In a large bowl, combine the sugar cookie mix, melted butter, egg, all-purpose flour, quick oats, and ground cinnamon. I like to use a stand mixer for this, but a hand mixer works just fine too. Mix until everything comes together into a crumbly but cohesive dough. The texture should be moist but not sticky. Once you see those golden oats peeking through, you’re ready to move to the next step. It’ll look good enough to sneak a taste or two!
Press Crust into Baking Dish
Grab about three-quarters of that crust mixture and start pressing it into the bottom of the prepared baking dish. Use your fingers or a spatula for an even layer. Make sure you press firmly, creating a solid base for our bars. An even layer will ensure every bite has the delightful flavor of the crust. It should feel like a comforting embrace for the cranberry filling coming up next!
Prepare the Cranberry Filling
Let’s whip up that delicious cranberry filling! In a separate bowl, stir together the frozen cranberries, granulated sugar, cornstarch, ground cinnamon, and cranberry juice. Be sure to mix gently to avoid squishing the berries. You want them to maintain their shape, offering bursts of tartness in every bite. Ensure the sugar is evenly distributed as it will balance the tartness beautifully. This filling is what makes the bars irresistible!
Assemble the Cranberry Bars
It’s time to assemble! Spread the cranberry mixture evenly on top of the pressed crust. Then, sprinkle the remaining crust mixture over that luscious layer. Make sure it’s distributed well over the cranberries—this will create that sought-after crumbly topping. It’s like tucking the filling into a cozy blanket, setting it up for delicious success!
Bake to Perfection
Slide the baking dish into the oven and let it work its magic for about 35 to 40 minutes. Keep an eye on it, though! You’re looking for a golden brown topping and bubbling filling. This means your Cranberry Bars are baking up beautifully. When it’s done, the aroma will tempt your senses—it’s hard to resist, but patience is key!
Cooling and Serving
After the baking time, let your bars cool in the pan for at least 10 minutes. If you want the best texture, allow them to cool completely before slicing. This helps them set nicely. Once cool, cut these delights into squares, and they’re ready to be served. Enjoy the fruits of your labor!
Tips for Success
- For the best flavor, use fresh cranberries when in season; they enhance the taste dramatically.
- Chill your butter before melting to prevent it from becoming too hot—this keeps your crust’s texture spot on.
- Don’t skip the parchment paper; it guarantees a smooth lift and perfect squares every time.
- Experiment with spices like nutmeg for a unique twist on flavor!
- Store bars wrapped tightly to keep them fresh—even the next day, they’re scrumptious!
Equipment Needed
- Baking Dish: A 9×13 inch dish is ideal; you can use a glass or metal one.
- Mixing Bowl: A large bowl is essential—grab any that you have handy!
- Hand Mixer or Stand Mixer: Either works for mixing the dough; a whisk will do in a pinch!
- Spatula: Perfect for spreading and pressing the crust evenly into the dish.
- Parchment Paper: Helps with easy removal; if you don’t have it, grease the dish well!
Variations
- Nutty Twist: Add chopped walnuts or pecans to the crust for a crunchy texture that complements the softness of the cranberries.
- Gluten-Free Option: Substitute the sugar cookie mix with a gluten-free blend to make these bars suitable for gluten-sensitive friends.
- Cheesy Delight: Mix in a layer of cream cheese to the filling for a rich, creamy contrast with the tart cranberries.
- Orange Zest: Incorporate some orange zest into the cranberry filling for a fresh citrus flavor that brightens each bite.
- Vegan Version: Use a vegan cookie mix, flax egg, and dairy-free butter for a plant-based adaptation that doesn’t skimp on taste.
Serving Suggestions
- Pairs beautifully with a scoop of vanilla ice cream, adding a creamy touch to the tartness.
- Enjoy with a dollop of whipped cream on top for a decadent dessert experience.
- Serve alongside a warm cup of tea or coffee to balance the sweetness.
- For presentation, dust the bars with powdered sugar for a beautiful finish.
- Consider adding a sprinkle of fresh cranberries on the plate for a pop of color.
FAQs about Cranberry Bars
Got questions about these delightful Cranberry Bars? I’ve got you covered! Here are some common inquiries that may pop up while you’re baking:
Can I use fresh cranberries instead of frozen?
Absolutely! Fresh cranberries are perfect for this recipe. Just remember to adjust the sugar since fresh ones can be a bit tarter.
How do I store leftover Cranberry Bars?
Keep your bars in an airtight container in the fridge. They’ll stay fresh for up to a week—if they last that long!
Can I make these bars ahead of time?
You sure can! These Cranberry Bars taste even better the next day after the flavors meld together. Just be sure to let them cool completely before storing.
What can I do if the filling is too runny?
If your filling seems too runny, don’t worry! Just sprinkle in a little extra cornstarch and mix gently. This will help thicken it for a perfect texture.
Can I freeze Cranberry Bars?
Yes! You can freeze them for up to three months. Wrap them tightly in plastic wrap or foil, then place them in a freezer-safe container.
Final Thoughts
Making Cranberry Bars isn’t just about the recipe; it’s about creating moments that linger long after the last bite. Whether you enjoy them fresh from the oven or as a sweet treat for an after-school snack, these bars carry the essence of home and warmth. Baking these delightful squares connects us with loved ones and invites smiles and happy chatter around the table. It’s a fantastic reminder that even in our busy lives, there’s always time for a little sweetness. I hope you find as much joy in these bars as I do with each delicious slice!