

Introduction to Cranberry Lemon Bars
As a busy mom, I know that finding the perfect dessert can feel like searching for a hidden treasure. Cranberry lemon bars are my go-to solution when I crave something sweet but don’t have hours to spare in the kitchen. With their delightful combination of tangy cranberries and sweet, zesty lemon, these bars are sure to please a crowd, whether it’s a family dinner or a cheerful potluck. Plus, they come together quickly, making them perfect for those hectic days when you want to impress loved ones without breaking a sweat!
Why You’ll Love This Cranberry Lemon Bars
Cranberry lemon bars are the perfect blend of ease and taste that I always reach for when short on time. They come together quickly, allowing you to whip up a delightful dessert in just over an hour. The buttery shortbread crust provides a comforting base, while the bright and tangy filling awakens the senses. If you want a dessert that steals the spotlight without hours of effort, these bars are your new best friend!
Ingredients for Cranberry Lemon Bars
Gathering your ingredients is half the fun of baking! For these cranberry lemon bars, you’ll need a few pantry staples and some fresh goodies that pack a punch of flavor. Here’s what you’ll need:
- Salted butter: Provides that rich, indulgent flavor in the crust.
- Granulated white sugar: Sweetens both the crust and the filling for balance.
- Pure vanilla extract: Adds a warm aroma that complements the lemon and cranberry.
- All-purpose flour: Essential for crafting the crumbly shortbread crust and tender filling.
- Large whole eggs: These bind the filling together and help it set beautifully.
- Lemon zest: Don’t skip this! It boosts the lemon flavor without extra liquid.
- Fresh lemon juice: The star ingredient gives that lovely tang and brightness.
- Whole-berry cranberry sauce: Adds a pop of flavor and color; you can use homemade or store-bought, depending on your time.
While these ingredients are essential, feel free to experiment! You can substitute unsalted butter if you prefer more control over the saltiness. If cranberry sauce isn’t your jam, a fruit compote might work just as well.
You can find the exact quantities at the end of the article, ready for printing. So let’s roll up those sleeves and create something magical in the kitchen!
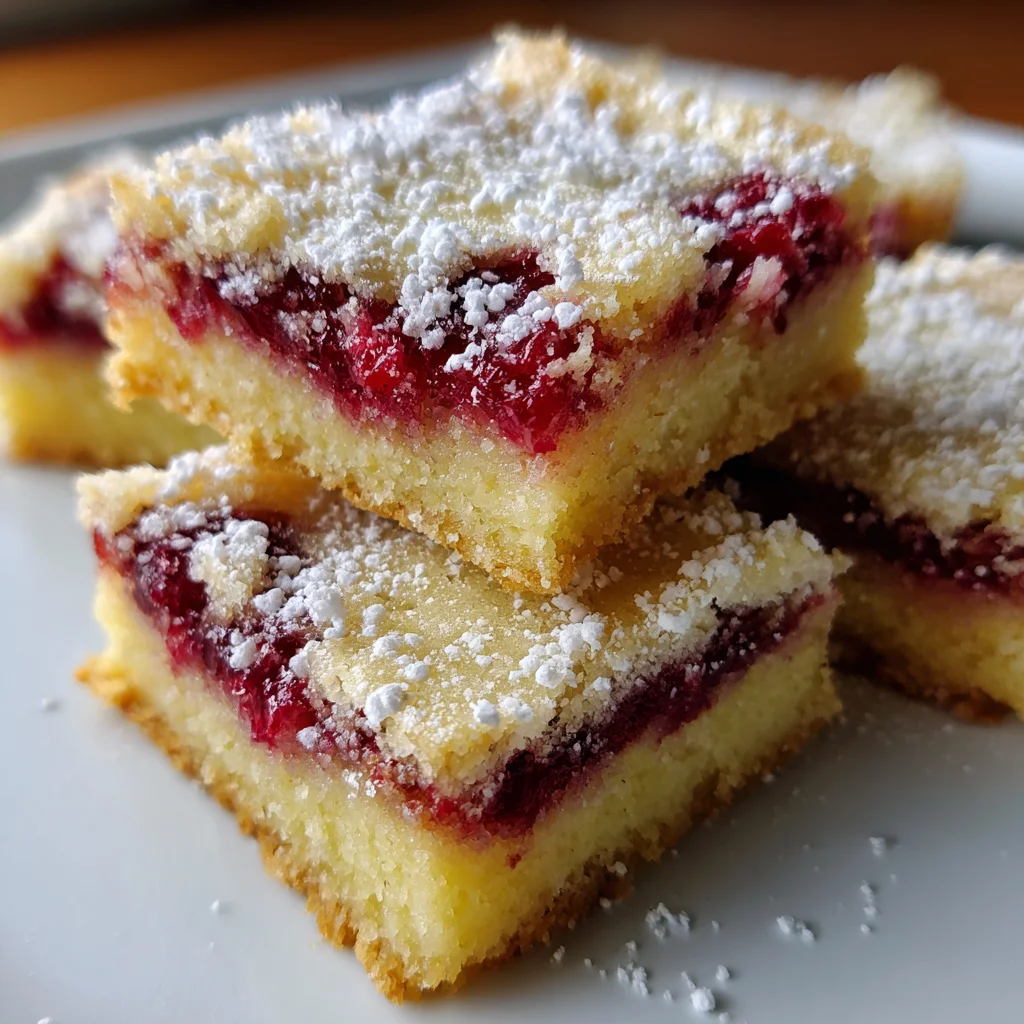
How to Make Cranberry Lemon Bars
Step 1: Prepare Your Baking Pan
First things first, let’s get that oven warmed up! Preheat your oven to 350°F (175°C). While it heats up, grab a 9 x 9-inch baking pan. Line the bottom and sides with parchment paper, leaving some overhang on the edges. This makes it super easy to lift the bars out later. Trust me, wrestling with stuck bars is not a fun kitchen adventure! Once that’s done, set your pan aside and let’s get ready to create that buttery crust.
Step 2: Make the Shortbread Crust
In a mixing bowl, combine softened salted butter and granulated sugar. Using either a hand or stand mixer, beat them until it’s light and fluffy, which usually takes about 2-3 minutes. Then, add in the pure vanilla extract; it’ll make your batter smell heavenly!
Now, it’s time to add the all-purpose flour gradually, mixing until a dough forms. Be careful not to over-mix, or you risk losing that gorgeous crumbly texture we love in shortbread. If your dough clings together but feels softer than playdough, you know you’ve got it just right! Next, use a spatula or your hands to spread this delicious dough evenly into the prepared pan, making sure to press it down well.
Step 3: Bake the Crust
Place your crust in the preheated oven and let it bake for 20-25 minutes. The key is to watch for a lovely golden brown on the edges. You want that crust to be firm but still a bit soft in the center. To check for doneness, gently touch the surface; if it feels set but still springs back, it’s ready to come out! Set it aside to cool slightly while we prepare the filling.
Step 4: Prepare the Lemon Mixture
In a clean mixing bowl, whisk together the large eggs, granulated sugar, lemon zest, and fresh lemon juice until everything is well combined. The whisk is your best friend here; it helps incorporate air to give the filling that delightful fluffiness. Once blended, sift the all-purpose flour into the bowl and gently stir until you have a smooth batter. No lumps allowed! That silky mixture is what makes the lemon layer a star.
Step 5: Layer the Ingredients
Now for the fun part! First, ensure your crust is still warm to help the layers stick. Spread the whole-berry cranberry sauce evenly over the warm crust. I find that using an offset spatula helps to smooth it out nicely. It’s like painting a canvas, but with delicious flavors! Then, gently pour the lemon mixture over the cranberry layer, being careful not to disturb it too much. This way, you’ll have those beautiful layers we all love in cranberry lemon bars!
Step 6: Final Bake
Slide the pan back into the oven and bake for an additional 30-35 minutes. You’ll know it’s done when the edges start to pull away from the sides of the pan and the center is just set. A little jiggle in the middle is perfectly okay! It will firm up as it cools. Trust the process; those luscious, tangy lemon bars will be worth the wait!
Step 7: Cool and Slice
Once baked, remove your bars from the oven and let them cool completely in the pan. Getting impatient? I get it! But allow them to rest for at least 15 minutes on the counter, then transfer to the fridge for a few hours or even overnight. It really helps with cutting those bars cleanly. When you’re ready to serve, simply dust the top with powdered sugar for a delightful finishing touch before slicing into 16 squares. Get ready for the compliments!
Tips for Success
- Always use room temperature butter for a smoother crust.
- For a stronger lemon flavor, zest the lemons right before juicing.
- Don’t rush cooling! Letting the bars chill properly makes slicing easier.
- Use a serrated knife for neater slices.
- Keep an eye on the baking time; ovens can vary!
Equipment Needed
- Baking pan: A 9 x 9-inch pan works best, but an 8 x 8-inch pan will suffice.
- Parchment paper: For easy removal, but foil can be a quick alternative.
- Mixing bowls: Use medium-sized for the filling and a larger one for the crust.
- Hand or stand mixer: A whisk will do in a pinch if you’re feeling strong!
- Offset spatula: Great for spreading, but any spatula can work just fine.
Variations
- Fruit Infusions: Substitute the cranberry sauce with raspberry or cherry for a twist on flavor.
- Gluten-Free Option: Replace all-purpose flour with a gluten-free blend to make these bars suitable for gluten-sensitive friends.
- Coconut Bliss: Add shredded coconut to the lemon mixture for a tropical touch.
- Nutty Crunch: Incorporate crushed walnuts or pecans into the crust for added texture and flavor.
- Herbal Twist: Experiment by adding fresh mint or basil into the lemon mix to elevate flavors further.
Serving Suggestions for Cranberry Lemon Bars
- Pair these bars with a scoop of vanilla ice cream for a delicious contrast.
- A dollop of freshly whipped cream enhances the tangy flavors.
- Serve with a side of fresh berries for added sweetness and color.
- Complement with a cup of herbal tea or lemonade for a refreshing drink.
- For presentation, slice the bars into neat squares and dust with powdered sugar before serving.
FAQs about Cranberry Lemon Bars
Can I use frozen cranberries instead of cranberry sauce?
Absolutely! If you have frozen cranberries on hand, you can make your own cranberry sauce by cooking them down with a bit of sugar. Just ensure they’re thawed and drained well before layering!
Can I make these bars ahead of time?
You bet! Cranberry lemon bars taste even better when made ahead of time. Just prepare them a day in advance, chill them thoroughly, and slice them right before serving. Easy peasy!
What should I serve with cranberry lemon bars?
These bars pair wonderfully with a simple dollop of whipped cream or a scoop of vanilla ice cream. Fresh berries alongside add some extra flair. So pretty and delicious!
How long will the bars last?
In the fridge, these delightful bars will remain fresh for up to three days. Just make sure to keep them covered to maintain their flavor and texture.
Can I freeze cranberry lemon bars?
Yes! You can freeze them for up to three months. Just slice them and wrap each piece tightly in plastic wrap and aluminum foil. Thaw in the fridge for a tasty treat any day!
Final Thoughts
Baking cranberry lemon bars isn’t just about satisfying a sweet tooth; it’s about creating delightful moments. Each bite is a burst of tangy and sweet flavor that brings back childhood memories of sunny days and family gatherings. Plus, this recipe gives you the chance to find joy in the kitchen, even amidst a busy schedule. As you pull those golden bars from the oven, you’ll find that the little things really do matter. So, whether it’s for a special occasion or simply to brighten a weekday, these bars will surely make hearts shine!