
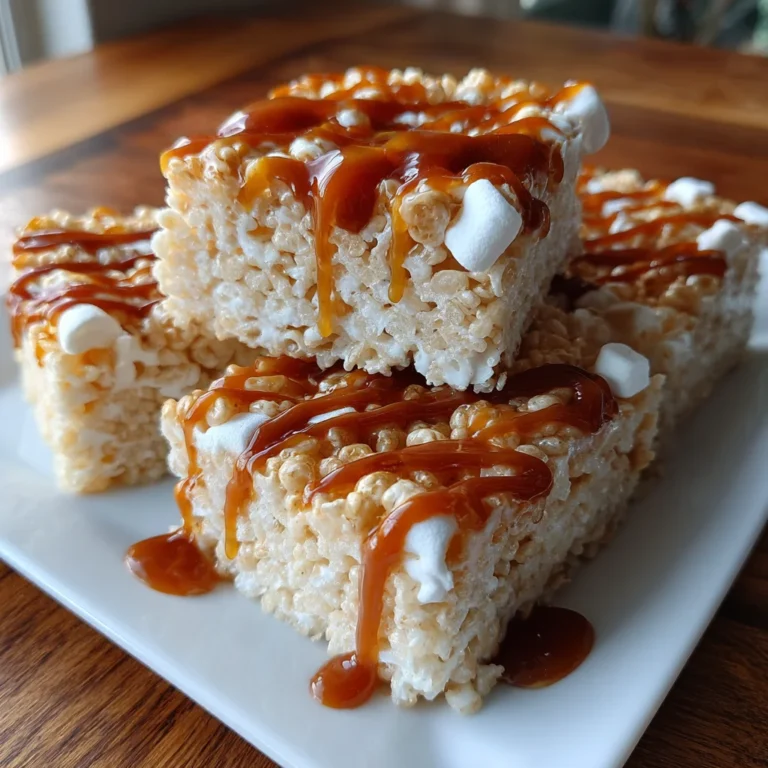
Introduction to Salted Caramel Rice Krispie Treats
Let me take you on a sweet journey with these irresistible Salted Caramel Rice Krispie Treats. As a busy mom, I know how challenging it can be to whip up something delicious quickly. This recipe is the perfect solution for those days when you want to treat your family but have just a few minutes to spare. The delightful combination of gooey marshmallows and drizzled salted caramel? It’s like a warm hug in dessert form. Trust me, you’ll have everyone asking for seconds!
Why You’ll Love This Salted Caramel Rice Krispie Treats
These Salted Caramel Rice Krispie Treats are not only super easy to make but also incredibly quick—perfect for those hectic afternoons. In just 45 minutes, you can create a delightful dessert that combines sweet and salty flavors, making it a guaranteed crowd-pleaser. Plus, they’re perfect for every occasion, whether it’s a casual family gathering or a special treat to surprise your loved ones. Who can resist that?
Ingredients for Salted Caramel Rice Krispie Treats
Gathering your ingredients for these Salted Caramel Rice Krispie Treats is half the fun! Here’s what you’ll need to bring this delightful treat to life.
- Unsalted Butter: This is the base of our treats. It adds richness and a velvety texture that complements the other flavors.
- Caramel Sauce: Look for a nice, creamy caramel. It’s the heart of the treat and gives that lovely drizzle we all adore.
- Kosher Salt: A sprinkle of this magical salt balances the sweetness beautifully. Feel free to adjust it based on your personal taste.
- Mini Marshmallows: These fluffy wonders melt down to create the gooey goodness we crave in a Rice Krispie treat.
- Rice Krispies Cereal: This crunchy component adds that iconic texture we all know and love. It’s the star of the show!
- Additional Kosher Salt for Garnish: A little extra salt on top enhances the flavors and makes it look pretty too!
For those who like to tweak recipes, you can swap regular caramel with chocolate or butterscotch for a fun twist. You’ll find the exact measurements at the bottom of the article, ready for you to print out and use at your convenience!
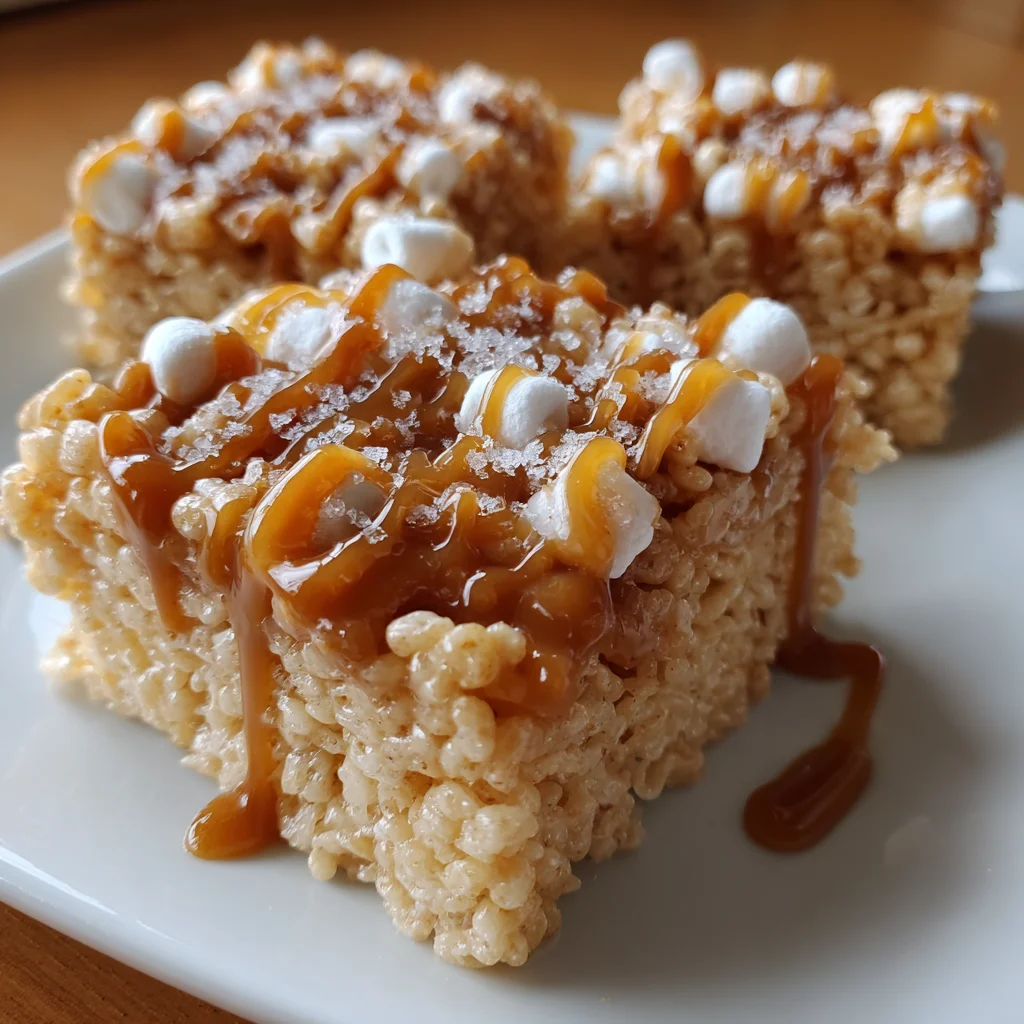
How to Make Salted Caramel Rice Krispie Treats
Now that you’ve gathered all your ingredients, let’s jump into the fun part: making the Salted Caramel Rice Krispie Treats! This is where the magic happens, and I promise you’ll love how simple it is. Just follow these steps and enjoy each delicious moment.
Step 1: Prepare Your Baking Dish
First, grab your 9×13-inch baking dish and spray it generously with non-stick cooking spray. This helps prevent any sticky situations later on! Make sure the whole bottom is covered. Once you’ve done that, set the dish aside. Trust me, you’ll appreciate this prep in the next steps!
Step 2: Melt Butter and Caramel
Set a large pot over medium-low heat. Add your unsalted butter and pour in half a cup of caramel sauce. As it begins to melt, stir it constantly. You’ll want to keep a close eye—don’t rush this part! The luscious aroma of butter mingling with caramel will fill your kitchen, putting a smile on your face. This is dessert heaven in the making!
Step 3: Add Marshmallows and Salt
When the butter and caramel mixture is completely melted, it’s time for the mini marshmallows. Add them to the pot alongside the kosher salt. Stir continuously until the marshmallows have fully melted and the mixture becomes smooth and glossy. You want it to be blissfully gooey with no lumps remaining. This velvety texture is key to your treats!
Step 4: Combine with Rice Krispies
Now comes the fun part! Remove the pot from the heat and spray a rubber spatula with non-stick spray too. Gently fold in the Rice Krispies cereal. Use a careful motion so you don’t crush the cereal. The goal is to have each piece coated in that heavenly marshmallow mixture without turning it into mush. It’s like a dance; be gentle and let everything come together!
Step 5: Press into Baking Dish
Transfer the Rice Krispie mixture to your prepared baking dish. Use the spatula to spread it out evenly. Then, press down firmly to create a compact layer. This step is crucial to ensure all the treats hold together beautifully. Just imagine the joy when you slice into them and they stay intact!
Step 6: Garnish and Cool
Let your treats cool to room temperature, which should take about 30 minutes to an hour. Once they’re cool, it’s drizzling time! Pour the remaining caramel sauce on top, and don’t forget to sprinkle a pinch of kosher salt for that perfect sweet and salty balance. This little extra touch will elevate your Salted Caramel Rice Krispie Treats even more. Now, slice them up, and get ready for some happy faces!
Tips for Success
- Always use fresh marshmallows for the best texture.
- For extra richness, consider browning the butter before melting it with the caramel.
- Let your treats cool fully before cutting to ensure nice, clean edges.
- Store them in an airtight container to maintain freshness.
- Experiment with different caramel toppings for a fun twist!
Equipment Needed
- Large Pot: A medium to large pot works perfectly for melting ingredients.
- Rubber Spatula: This is ideal for mixing and folding in the Rice Krispies. A wooden spoon can be used as a substitute.
- 9×13-inch Baking Dish: A standard glass or metal dish ensures even setting. You can also use a parchment-lined pan!
- Non-Stick Cooking Spray: Helps prevent sticking. Alternatively, you can line the baking dish with parchment paper.
Variations for Salted Caramel Rice Krispie Treats
- Chocolate Drizzle: Swap the salted caramel for melted chocolate, or drizzle both for an extra indulgence!
- Nutty Twist: Add chopped nuts like almonds or pecans for a delightful crunch and added nutrition.
- Peanut Butter Bliss: Mix in some creamy peanut butter with the melted marshmallows for a nutty flavor that complements the caramel perfectly.
- Vegan Option: Use coconut butter and dairy-free chocolate or caramel to create a delicious vegan rendition of these treats.
- Seasonal Flavors: Experiment by adding crushed candies like peppermint or pumpkin spice for holiday-themed variations!
Serving Suggestions for Salted Caramel Rice Krispie Treats
- Serve with Ice Cream: A scoop of vanilla ice cream perfectly complements the treats.
- Pair with Coffee: Enjoy a warm cup of coffee for a delightful afternoon pick-me-up.
- Presentation: Cut into fun shapes using cookie cutters for festive occasions.
- Gift Idea: Package in a decorative box tied with a ribbon for a sweet gift!
FAQs about Salted Caramel Rice Krispie Treats
As a fellow home cook, I know that you might have a few lingering questions about these delicious Salted Caramel Rice Krispie Treats. Let me address some common ones that pop up to help you on your sweet journey!
Can I make these treats ahead of time?
Absolutely! These treats can be made a day in advance. Just ensure you store them in an airtight container to keep them fresh.
What’s the best way to store leftovers?
To keep your leftovers nice and chewy, store them in an airtight container at room temperature for up to three days. They are perfect for snacking anytime!
Can I use regular marshmallows instead of mini ones?
Yes, you can! Just cut larger marshmallows into smaller pieces before melting. They’ll still melt wonderfully, giving you that gooey texture!
What can I substitute for caramel sauce?
If you want to switch things up, you can use chocolate sauce or a homemade butterscotch. Either of these can deliciously complement the Rice Krispies.
How do I prevent my treats from being too hard?
Make sure to not over-press the mixture into the pan. Being gentle will keep the texture soft and chewy instead of dense!
Final Thoughts
Making these Salted Caramel Rice Krispie Treats is not just about blending ingredients; it’s about creating joyful moments in your kitchen. I still remember the first time I pulled a batch from the oven, the sweet scent enveloping my home. Watching my family devour these treats brought a sense of satisfaction only home-cooked treats can deliver. Whether served at a party or enjoyed as an after-school snack, they’re guaranteed to bring smiles all around. So gather your loved ones, whip up a batch, and enjoy the sweet chaos that follows—it’s what delicious family memories are made of!