
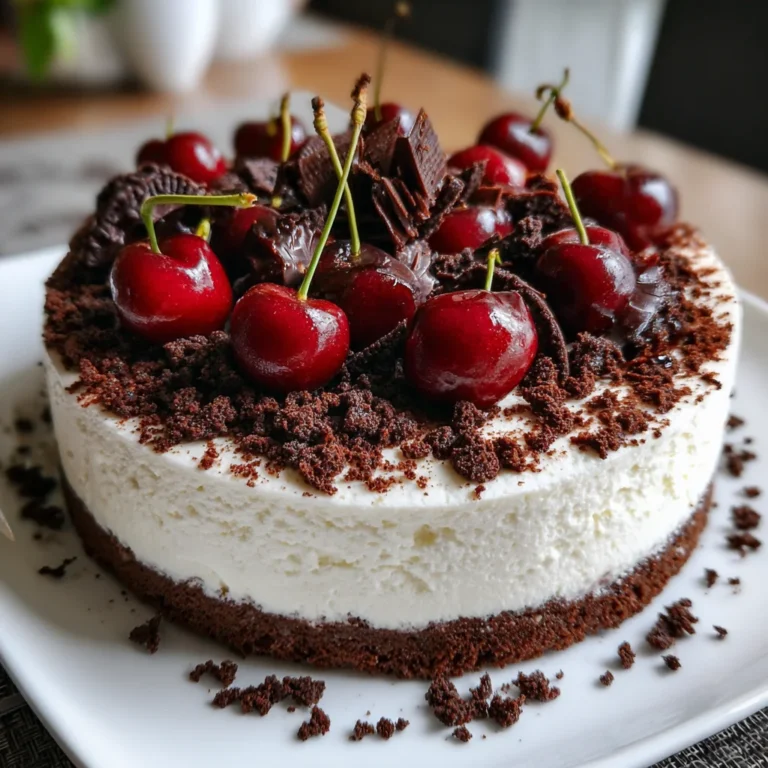
Introduction to Black Forest Cheesecake
Oh, the sweet aroma of a freshly baked dessert can instantly uplift any mood! Today, I’m sharing my scrumptious Black Forest Cheesecake, a delightful treat that combines creamy cheesecake, rich chocolate, and luscious cherries. Perfect for busy moms like me, this recipe offers a quick solution for last-minute gatherings or a simple indulgence after a hectic day. Imagine surprising your family with this decadent cheesecake that looks as amazing as it tastes. With just a bit of prep, you’ll create a dessert that will leave everyone begging for seconds—and trust me, it’s certainly worth the effort!
Why You’ll Love This Black Forest Cheesecake
This Black Forest Cheesecake checks all the boxes for a delightful dessert! It’s easy to whip up, even on a busy afternoon, making it perfect for last-minute celebrations or family dinners. The combination of creamy cheesecake, velvety chocolate, and sweet cherries creates a flavor explosion that will impress anyone. Plus, it’s a make-ahead treat, allowing you to relax and savor every bite without the stress of last-minute baking!
Ingredients for Black Forest Cheesecake
Let’s talk about the star players in this Black Forest Cheesecake! While the exact measurements are available for printing at the bottom of the article, here’s a rundown of the essential ingredients:
- Chocolate cookie crumbs: These provide a rich, chocolatey base. You can use store-bought or crush your favorite chocolate cookies at home!
- Unsalted butter: This helps bind the crust together, giving it a deliciously buttery taste.
- Cream cheese: The heart of any cheesecake! Softened cream cheese creates a creamy, dreamy texture that melts upon biting.
- Powdered sugar: This sweetens the cheesecake without leaving any gritty texture behind. It’s a baker’s best friend!
- Vanilla extract: A splash of vanilla enhances all the other flavors, making it more aromatic and delightful.
- Heavy whipping cream: Whipping this to soft peaks adds fluffy lightness to the cheesecake. It’s crucial for the dreamy finish!
- Sour cream: This adds a tangy richness, balancing the sweetness while keeping the cheesecake moist.
- Cherry pie filling: The signature ingredient! It’s sweet, fruity, and the perfect topping for this decadent dessert.
- Cocoa powder: This intensifies the chocolate flavor and adds depth to the cheesecake.
- Dark chocolate (for garnish): A touch of grated dark chocolate not only looks fancy but also adds another layer of chocolate flavor.
- Fresh cherries (for garnish): Not only do they make for a beautiful presentation, but they also add a refreshing burst of flavor!
Gather these delightful ingredients and get ready to create a dessert that will leave your guests in awe. Remember, the joy lies in the preparation, and with this cheesecake, you’re sure to impress!
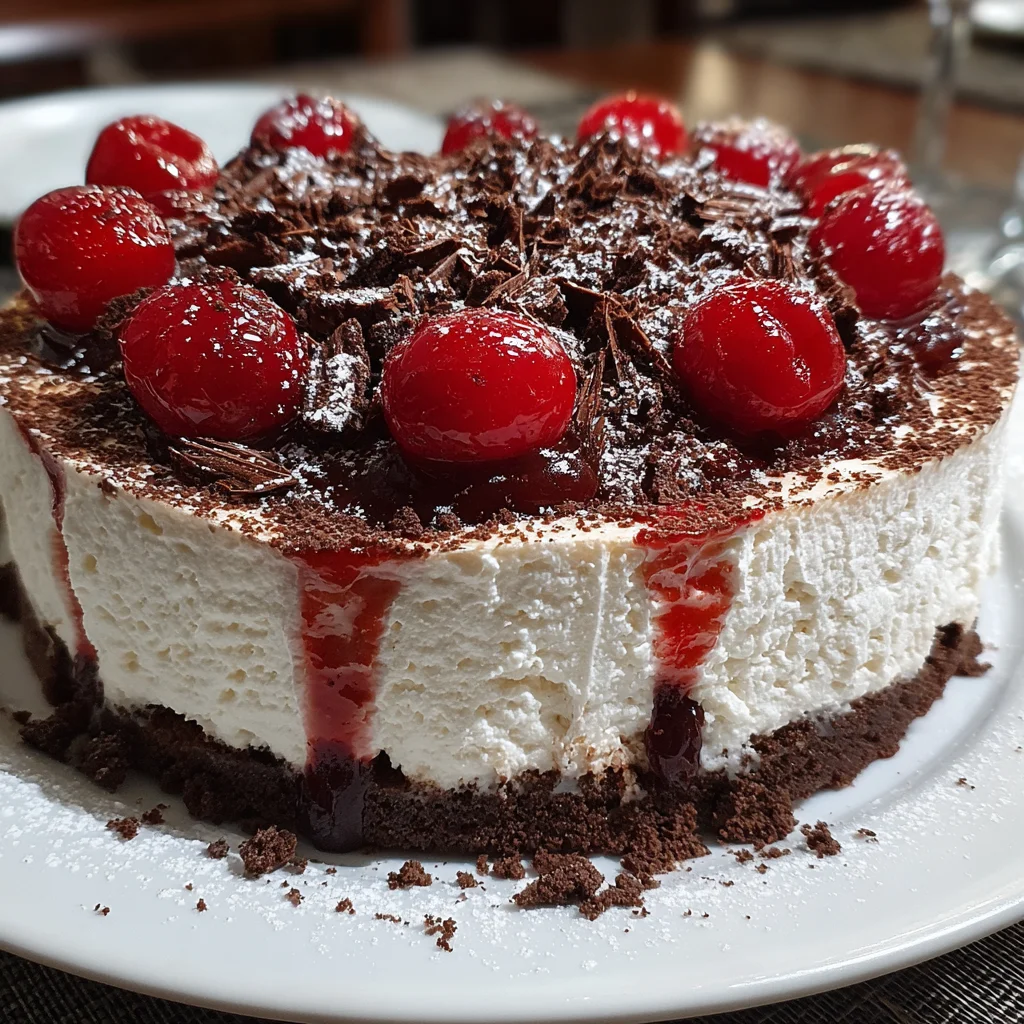
How to Make Black Forest Cheesecake
Ready to create the magic of a Black Forest Cheesecake? Let’s break it down step by step. Each part is simple, yet together, they build a luscious, show-stopping dessert that everyone will rave about!
Step 1: Prepare the Springform Pan
Start by preheating your oven to 325°F (163°C). Don’t skip this crucial step; a warm oven helps the cheesecake cook evenly. Grease a 9-inch springform pan with a little butter to ensure that your cheesecake releases easily later on. Trust me, nobody likes dealing with a stubborn cake!
Step 2: Make the Chocolate Cookie Crust
In a bowl, mix chocolate cookie crumbs with melted butter until well combined. This mixture should feel like wet sand. Press it firmly into the bottom of your prepared pan. A solid, well-pressed crust keeps the cheesecake intact while cutting, giving you beautiful slices to serve!
Step 3: Beat the Cheesecake Mixture
In a large mixing bowl, beat the softened cream cheese, powdered sugar, and vanilla extract until smooth and creamy. You want a nice, silky texture—no lumps allowed! The cream cheese forms the backbone of your Cheesecake, ensuring each bite is rich and luxurious.
Step 4: Whip the Heavy Cream
In another bowl, whip the heavy cream until stiff peaks form. This step is a game-changer; the whipped cream gives the cheesecake its airy quality. For the best results, start with cold cream and a chilled bowl. As you whip, you’ll see it transform into fluffy sweetness that makes every bite divine!
Step 5: Combine Ingredients
Gently fold in the sour cream and cocoa powder into your cream cheese mixture. Mixing gently is key here; we want to maintain that fluffiness from the whipped cream. Take your time—slow and steady wins the race!
Step 6: Layer the Cheesecake
Now comes the fun part—layer the cheesecake! Pour half of the cheesecake mixture over the crust, then add half of the cherry pie filling. Repeat with the rest of the cheesecake mixture and topping it with the cherries. Try to distribute everything evenly for a beautiful presentation.
Step 7: Baking the Cheesecake
Place your cheesecake in the preheated oven and let it bake for 50-60 minutes. The edges should be set, while the center remains slightly jiggly. This is crucial for that tender texture! Once it’s done, turn off the oven and leave it inside for another hour to cool gradually.
Step 8: Cooling and Chilling
Once your cheesecake has cooled in the oven, let it sit at room temperature for a while. Then, transfer it to the refrigerator to chill for at least 4 hours, but overnight is even better! This allows all those lovely flavors to meld together while creating the perfect texture.
Step 9: Garnishing
Right before serving, it’s time to make your cheesecake shine! Garnish with grated dark chocolate and a mix of fresh cherries on top. Not only does this add a pop of color, but it also enhances that chocolate and cherry flavor that makes Black Forest Cheesecake so special!
Tips for Success
- Use room temperature cream cheese to achieve a smoother, lump-free batter.
- Whip the heavy cream until stiff peaks form, giving the cheesecake its airy texture.
- Let your cheesecake cool slowly in the oven to prevent cracks.
- For the best flavor, chill the cheesecake overnight before serving.
- Don’t skip the garnish—fresh cherries and chocolate elevate presentation!
Equipment Needed
- 9-inch springform pan: Essential for easy removal of the cheesecake.
- Mixing bowls: Use a large bowl for the cream cheese mixture and a separate one for whipping the cream.
- Electric mixer: A hand mixer or stand mixer works well for beating!
- Measuring cups and spoons: Accurate measurements are key!
- Rubber spatula: Perfect for folding and scraping down the sides of bowls.
Variations
- Gluten-Free Option: Substitute chocolate cookie crumbs with crushed gluten-free cookies or almond flour for a gluten-free version.
- Lower Sugar Version: Use a sugar substitute like stevia or monk fruit sweetener in the cream cheese mixture to reduce sugar content.
- Chocolate Lovers: Add melted chocolate into the cheesecake mixture for an extra chocolatey flavor.
- Fruity Twist: Swap the cherry pie filling for raspberry or blueberry filling to create a new flavor profile.
- Vegan Adaptation: Use vegan cream cheese and a plant-based whipped topping to make a dairy-free cheesecake.
Serving Suggestions
- Pair your Black Forest Cheesecake with a dollop of whipped cream for added creaminess.
- Serve alongside a scoop of vanilla ice cream to complement the chocolate and cherry flavors.
- A drizzle of chocolate or cherry sauce can elevate presentation and taste.
- Enjoy it with a cup of freshly brewed coffee or herbal tea for a delightful afternoon treat.
FAQs about Black Forest Cheesecake
Curious about making this delightful Black Forest Cheesecake? Here are some common questions I get from fellow bakers:
Can I make this cheesecake ahead of time?
Absolutely! In fact, making it a day in advance is ideal. This allows the flavors to marry beautifully while enhancing the texture. Just keep it covered in the refrigerator!
What can I substitute for heavy cream?
If you’re looking for a lighter option, try using half and half or coconut cream. While the texture might change slightly, it will still be delicious!
Can I use fresh cherries instead of cherry pie filling?
You certainly can! Fresh cherries can be used, but I recommend cooking them down with a bit of sugar to mimic the syrupy texture of pie filling. It will add a beautiful fruity flavor!
How do I prevent my cheesecake from cracking?
To avoid cracks, ensure that it cools slowly in the oven after baking. Also, don’t open the oven door during baking! A gentle bake helps maintain that smooth surface.
What’s the best way to store leftovers?
Store leftover slices in an airtight container in the fridge. It will stay fresh for up to 5 days! Just take it out a few minutes before serving to allow it to soften slightly.
Final Thoughts
Creating a Black Forest Cheesecake, for me, is more than just baking a dessert; it’s about crafting sweet memories that linger long after the last bite. The blend of creamy cheesecake, rich chocolate, and juicy cherries brings joy that warms the heart. Whether it’s for a family gathering or a quiet night in, this cheesecake has a way of making moments special. I love the surprised looks on my loved ones’ faces as they dig into a slice. Trust me, once you experience this indulgent beauty, it will become a cherished favorite in your home!