
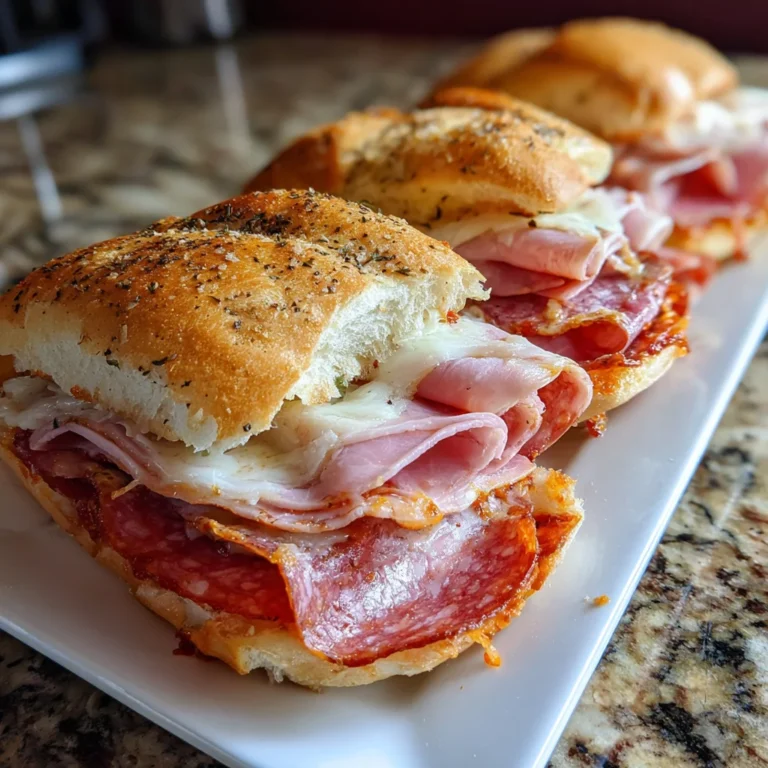
Introduction to Hot Italian Sub Sliders
Ah, the joy of food that warms your heart and satisfies your taste buds! Hot Italian Sub Sliders have quickly become my go-to snack for busy evenings and family gatherings. These little bundles of joy are not only a quick solution for a hectic day, but they also bring everyone together around the dinner table. With layers of deli meats, melted cheese, and a drizzle of seasoned butter, they’re perfect for impressing friends or just enjoying a cozy night in. Trust me, once you try these sliders, they’ll soon find a permanent spot in your weekly meal rotation.
Why You’ll Love This Hot Italian Sub Sliders
These Hot Italian Sub Sliders are a dream come true for busy cooks! Not only are they super easy to whip up, but they also deliver big on flavor. You can have them on the table in about 45 minutes, making them ideal for last-minute snacks or parties. Plus, the combination of cheesy, meaty goodness with a touch of tangy peppers hits all the right notes for a crowd-pleasing dish!
Ingredients for Hot Italian Sub Sliders
Gathering the right ingredients for Hot Italian Sub Sliders is part of the fun. Each component contributes to the magic that brings these sliders to life! Here’s what you’ll need:
- Soft rolls: Ideal for holding all those delicious fillings. Think of them as the cozy hug for your slider.
- Ham: Adds a savory flavor, perfect for a base. Go for thinly sliced to keep things manageable.
- Salami: This adds a smoky richness, providing that classic Italian taste. It’s like a party of flavors on its own!
- Pepperoni: A must-have for that slightly spicy kick and a touch of nostalgia. Who doesn’t love pepperoni?
- Provolone cheese: Creamy and melty, it binds all the meats together marvelously. It’s the glue of this culinary masterpiece.
- Sliced pepperoncini: These tangy gems offer a zesty crunch. They’re the secret weapon in elevating your sliders.
- Sliced pickled hot cherry peppers: They bring heat and vibrancy, balancing the richness of the meats.
- Salted butter: This is for brushing on top, creating a golden crust that’s hard to resist.
- Italian seasoning: A fragrant blend of herbs that instantly whisk you away to Italy.
- Garlic: Adding crushed garlic brings depth and an irresistible aroma to the mix.
- Marinara sauce: Optional for dipping, it’s like a warm embrace for your sliders. Serve it on the side to enjoy even more flavor!
For exact quantities of each ingredient, check out the details at the bottom of the article. Happy cooking!
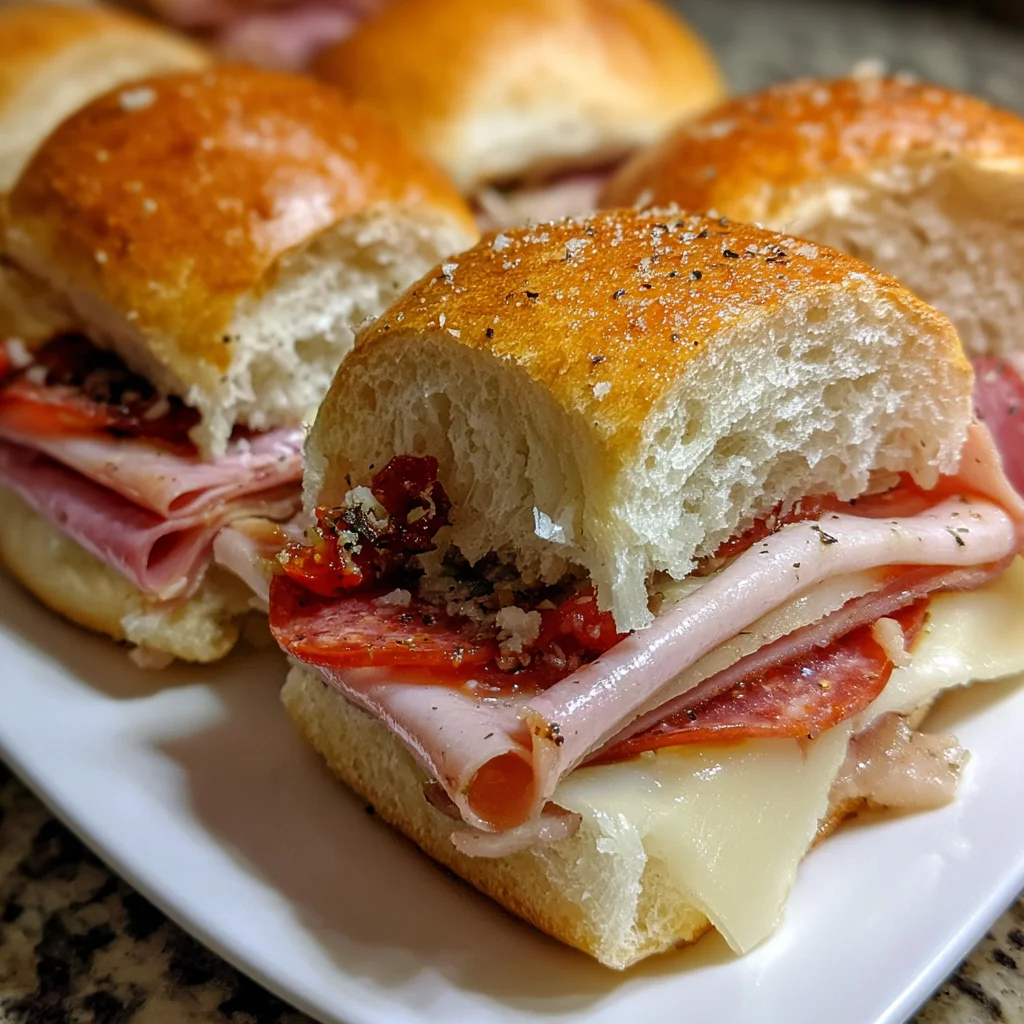
How to Make Hot Italian Sub Sliders
Step 1: Preheat the Oven
Preheating the oven is essential for achieving that golden-brown crust and perfectly melted cheese. If the oven isn’t hot enough, your sliders may turn out soggy instead of crispy. Set your temperature to 175°C and let it heat while you prepare the other ingredients. Trust me, your sliders will thank you!
Step 2: Prepare the Bottom Rolls
Let’s layer the bottom halves of those soft rolls like a delicious masterpiece! Start by placing them on a sturdy baking pan, cut side up. Begin with a generous layer of ham. Next, add salami and pepperoni, creating a delightful flavor base. Lastly, nestle slices of provolone cheese on top, covering the meats completely. This cheesy layer acts like a warm, cozy blanket, holding in all that scrumptiousness. Make sure every bite has a little of everything!
Step 3: Add the Toppings
Now, let’s jazz it up with some zing! Sprinkle the sliced pepperoncini evenly over the cheesy layer. These tangy little bites introduce a delightful crunch that livens up the sliders. Then, add the bright, sliced pickled hot cherry peppers. Their heat pushes the flavor into overdrive, creating a wonderful balance with the savory layers beneath. It’s like giving your sliders a party hat!
Step 4: Combine Ingredients for the Butter Mixture
In a small mixing bowl, stir together the melted salted butter, Italian seasoning, and crushed garlic. This seasoned butter mixture is the secret sauce to elevating your sliders. The butter helps create that beautiful, crunchy layer while infusing each bite with rich flavor. Just wait until you smell it!
Step 5: Apply the Butter Mixture
Using a brush or a spoon, generously coat the tops of the sliders with the flavorful butter mixture. Make sure to cover every inch. Even coverage is crucial for adding all those lovely flavors to your crispy topping. Don’t be shy – this is where the magic happens, turning ordinary bread into something truly special!
Step 6: Bake the Sliders
Cover the sliders with aluminum foil to keep them nice and warm as they bake. Pop them in your preheated oven and let them cook for about 30 minutes. You’ll know they’re ready when the cheese is melted, and the tops have turned a gorgeous golden brown. Your kitchen will smell amazing!
Step 7: Serve the Sliders
Once they’re out of the oven, slice the sliders into individual portions. Arrange them on a serving platter, and drizzle a bit more of that tantalizing butter mixture on top if you like. For an extra touch, serve warm with marinara sauce on the side for dipping. They’re sure to be a hit!
Tips for Success
- Let the butter mixture sit for a few minutes for enhanced flavor before applying.
- Feel free to swap out meats or cheeses based on your family’s preferences.
- Keep an eye on the sliders while baking; every oven is a little different!
- Allow sliders to cool slightly before serving to hold their shape better.
- Try adding sautéed onions or bell peppers for extra flavor.
Equipment Needed
- Baking pan: A sturdy sheet pan works wonders. If you don’t have one, a glass or ceramic dish will do.
- Mixing bowl: Any medium-sized bowl for combining ingredients will suffice; a measuring cup works too.
- Brush: A pastry brush is ideal for applying butter, but a spoon can work just as well!
- Aluminum foil: Essential for covering the sliders while they bake, but parchment paper is a good substitute.
Variations
- Meat Lovers’ Delight: For those who can’t get enough meat, layer in some turkey or roast beef to amp up the protein. Each bite will be a flavor-packed experience!
- Vegetarian Option: Swap the deli meats for grilled vegetables, like zucchini, bell peppers, and mushrooms. Add some feta cheese for a tangy twist that even meat lovers will appreciate.
- Spicy Kick: If you like a little heat, add some sliced jalapeños or a drizzle of hot sauce. This will transform your sliders into a spicy sensation!
- Cheesy Bliss: Experiment with different cheeses such as mozzarella, smoked gouda, or cheddar. Each cheese brings its own personality to the dish!
- Gluten-Free Choice: Use gluten-free rolls to make these sliders accessible for everyone at your table. They’re just as delicious!
Serving Suggestions for Hot Italian Sub Sliders
- Side Salads: Pair these sliders with a fresh arugula salad tossed in a light vinaigrette for a refreshing contrast.
- Chips or Fries: Serve with crispy potato chips or homemade sweet potato fries for a satisfying crunch.
- Cold Beverages: Opt for iced tea, sparkling water, or a crisp white wine to complement the flavors.
- Presentation: Arrange the sliders on a rustic wooden board for an inviting, family-style presentation.
FAQs about Hot Italian Sub Sliders
Can I make Hot Italian Sub Sliders ahead of time?
Absolutely! You can prepare the sliders up to the baking step and simply cover them in foil. When you’re ready to serve, just pop them in the oven. This is a great way to save time during a busy day!
What can I serve with these sliders?
Hot Italian Sub Sliders pair perfectly with a fresh salad, crispy chips, or flavorful fries. You can also serve them with marinara sauce for dipping, which adds another layer of yummy flavor!
Can I customize the filling ingredients?
For sure! The beauty of these sliders lies in their versatility. Feel free to swap out meats or cheeses according to your family’s preferences. Mix it up and get creative!
How do I store leftovers?
Store any leftovers in an airtight container in the fridge. They’ll be good for about three days. Just reheat them in the oven for a few minutes to restore their deliciousness!
Are Hot Italian Sub Sliders gluten-free?
These sliders can easily be made gluten-free by using gluten-free rolls. Everyone can enjoy the tasty goodness without compromising their dietary needs!
Final Thoughts
Hot Italian Sub Sliders are more than just a snack; they’re a celebration of flavors and togetherness. Each cheesy, meaty bite brings warmth and joy, making them perfect for gatherings or cozy family nights. Whether it’s a bustling weekday or a weekend party, these sliders come through with ease and deliciousness. I love how customizable they are—there’s something for everyone! So roll up your sleeves, gather your ingredients, and create some mouthwatering memories. Once you share these little delights, I guarantee they’ll become a cherished part of your recipe repertoire!